🌻 Free Sunflower Wind Spinner Crochet Pattern
Add a burst of sunshine to your garden, patio, or window with this Sunflower Wind Spinner Crochet Pattern—a fun, fast project that makes a beautiful statement wherever it’s displayed.

Whether you hang it outside to spin in the breeze or inside to brighten up a corner, this crochet wind spinner adds that perfect touch of charm to your outdoor space.
Table of contents
Why You’ll Love This Pattern
This easy crochet sunflower wind spinner pattern is beginner-friendly and works up quickly using just a few basic stitches.
Disclosure: This post may contain affiliate links. I may earn a small commission at no extra cost to you. All opinions are my own.
These wonderful crochet wind spinners make wonderful gifts to make and are great stash busters, as you can use your leftover yarn and make these in any color combinations
You can make a single sunflower spinner or create a set in different shades for a gorgeous summer-themed, or outdoor decoration.

The Magic Behind the Crochet windspinner Spiral – What is Hyperbolic Crochet?
were you told you were no good at maths? well heres fun facts about crocheting these spirasl you will enjoy!
The mesmerizing spiral shape of the wind spinner is no accident — it’s created using a fascinating technique known as hyperbolic crochet, which draws directly from mathematics.
By increasing stitches evenly in each round, you introduce negative curvature into the fabric. This causes the piece to naturally ruffle, curl, and spiral without any blocking or shaping.
It mimics the properties of hyperbolic planes, those beautiful curly surfaces often found in nature — like coral, lettuce leaves, and sea slugs.
Hyperbolic crochet is not only visually striking but also a fun, mind-bending way to explore geometry through yarn.
It’s a brilliant entry point into the world of sculptural and mathematical crochet design

Why is the Sunflower Crochet Wind Spinner So Popular?
This sunflower crochet wind spinner pattern has become a favourite among makers because it’s fun, quick to crochet, and adds a splash of handmade charm to any space.
Whether hung from a porch, garden stake, or even in a sunny window, it catches the breeze and spins beautifully, showing off its vibrant colors and 3D texture.
The pattern for the basic sunflower wind spinner uses simple stitches and techniques, making it accessible to beginners, yet satisfying for seasoned crocheters.
I originally designed this after seeing how much love my other wind spinner patterns received and I knew a sunflower version with sunflower appliqué would be perfect for sunny days and seasonal decorating!
Materials to crochet a sunflower windspinner
While you can use any yarn you like, choosing the right weight and fiber will influence the finished look and durability of your wind spinner.
For outdoor use, cotton yarn is a great choice because it’s sturdy, holds shape well, and handles weather better than acrylic. If you want a more vibrant and playful look, acrylic yarn works perfectly for indoor use and offers a huge range of colors
To make this crochet sunflower wind spinner, you’ll need:
- Yarn: ij total I used just under 100 grams combined DK or Worsted weight type of yarn in: (any color combinations)
- Yellow (petals)
- Brown (center)
- Green (stem & spiral)
- Hook: 4.00 mm hook or corresponding mm crochet hook size for yarn you are using, usually find this on the yarn label
- Scissors and tapestry needle
- Optional: small wooden bead or button for the center
Sunflower Crochet Pattern Starts HERE
This Sunflower Wind Spinner Crochet Pattern uses simple stitches:
Abbreviations (US Crochet Terms)
- Double crochet (dc)
- Treble crochet (tr)
- Slip stitch (sl st)
- Chain (ch)
Pattern Notes
- Pattern is written in US terms
- Adjust yarn weight and hook size as desired—the bigger the yarn, the thicker your spiral the bigger your sunflower
- The spiral section can be customized in length
A few notes before you start your wind spinner,
- I have found DK weight yarn the best (any heavier it just does not spin at all), or lovely cotton and keep stitches tight and even as you work
- Each ROW is started at the beginning so all stitches will go in one direction. So you will finish off at the END of each ROW
- If you CAN try to get a fishing swivel hook (kind of like the really small fishing swingles they use and tie the end of the Spinner with ONE thread to dangle from. )
- Use a single thread to attach to the end of the spinner, to hang
- I have made my wind spinners either way up and have not noticed much of a difference.
- The secret seems to be to make it roll it up into the spiral lightly spray down the sides and sit a heavy book on top of it and leave it to dry before hanging, this helps keeps the edges from curling.
Sunflower windspinner Crochet Pattern with Sunflower Embellishment (now added a pointed leaf sunflower too)

Before starting, watch this video on how to wind your windspinner once finished!
WINDSPINNER Crochet PATTERN
IN BROWN OR your Chosen color – Leave a long tail at beginning for securing later on)
Chain 100 +2
Row 1: sc in 2nd chain from hook and in each chain until the end. FASTEN OFF HERE.
Row 2: (BROWN) RETURN to the START, and join new yarn, work 2sc into EACH stitch of previous rows. FASTEN OFF HERE
Row 3: (BROWN) RETURN to the START, and join new yarn, work 3Double Crochet sts INTO the same st. To End. Fasten off.
Row 4: Return to START, and Join YELLOW, Leave a long tail HERE
Chain 1, SC in the Base of the single crochet, *SKIP next st, work 5DC into the NEXT St, skip Next st, Sc into the nxt stitch* you will repeat from * to * along the last row of 3dcs in each stitch, finish with a single crochet into the last st.
Fasten off and weave in ends. Leaving a long tail at the FIRST stitch of Row 1 and a long tail at the last stitch of last Row.
Twist into shape so the discs are all stacked upon each other as shown in the video
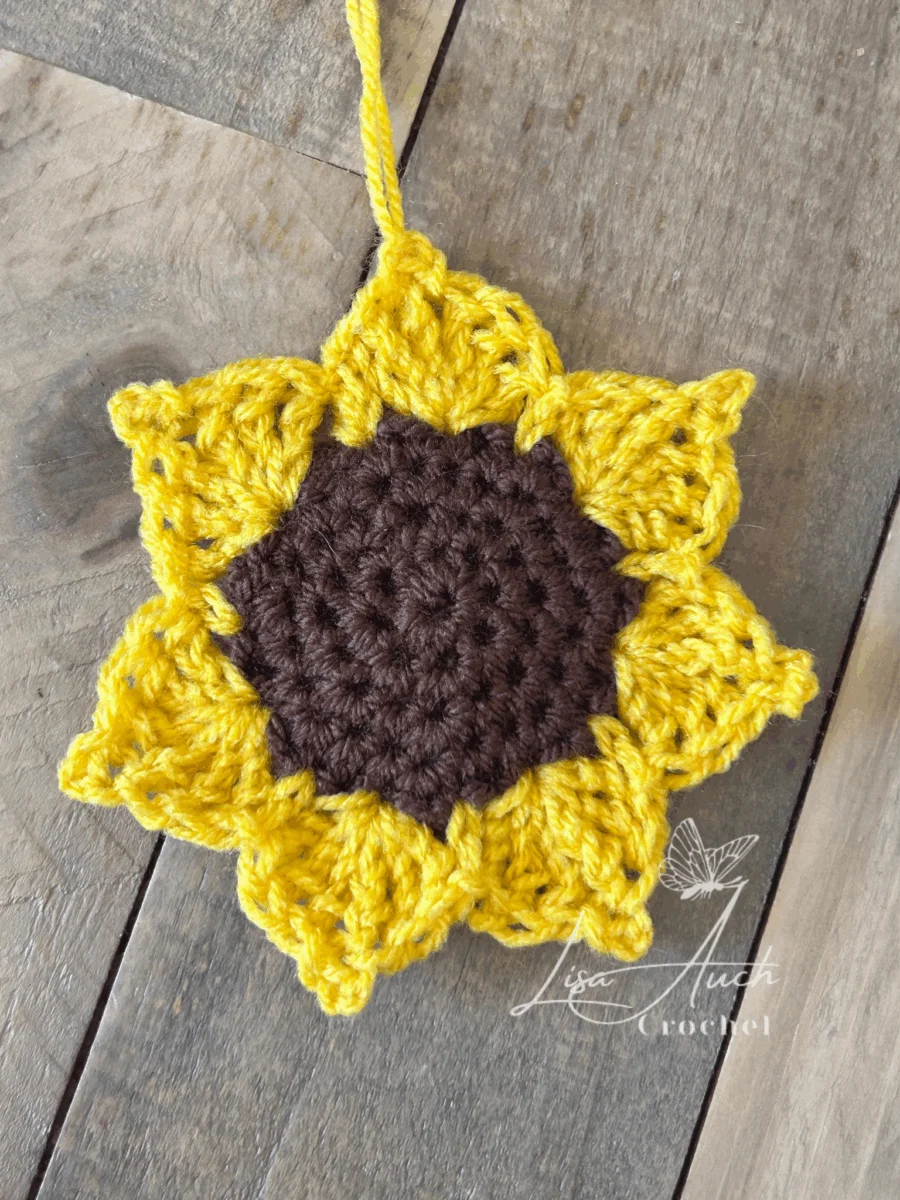
How to crochet the Sunflower applique for the windspinner
You do not need to know how to crochet a magic circle to make the sunflower
Rnd 1: Chain 2 to start, working into the first chain on the hook, sc in each stitch around, (Do NOT join) and place marker (6 sc)
Rnd 2: work 2sc into each stitch around (12sc)
Rnd 3: (work 2sc, sc in next st) repeat around (18sc)
Rnd 4: (work 2sc, sc in next 2 sts ) repeat around (24)
Rnd 5: (work 2sc, sc in next 3 sts ) repeat around (30)
Make another BROWN following for Rnd 1- Rnd 4
Holding the 2 Brown circles together, and work through both sides to join as you work the petals (alternatively sew 2 pieces together and stuff lightly ) this helps to balance the windspinner
Choose how to finish your sunflower with rounded or pointed petals, listening to customer feedback the most requested was a sunflower with pointed petals so i have also included the pointed petal sunflower below,

Rounded PETALS Rnd 1: JOIN yellow yarn, ch1, and single crochet into the SAME space, *skip 1 sts, 5 treble crochet in next stitch, skip 1, single crochet in next* repeat ** around.
Fasten off and weave in all edges.
Pointed Petals for your sunflower
JOIN yellow yarn, ch1, and single crochet into the SAME space, *skip 1 sts, (work 3 Treble crochet, chain 3, slst back into the first chain, 3 Treble Crochet ALL in next stitch), skip 1, single crochet in next* repeat ** around. Fasten off and weave ends up to the next point on the crochet sunflower
Finishing off your windspinner & Best Results to spin freely.
1.Once you have wound your spinner into shape (see video above)
secure the sunflower to the BOTTOM of your spinner. This gives extra weight to help balance the spinner
2.Attach the very top of the windspinner to one of the swivels, with a length of yarn attached to it to hang from a hook

Assemble your spinner – secure the sunflower to the BOTTOM of your spinner
attach the very top of the windspinner to one of the swivels, with a length of yarn attatched to it to hang from a hook. for best results to spin freely.
If you dont have the fishing swivels
Add a Hanging Loop and Finishing Tips
Once you’ve completed the spinner and sunflower center, finish the project by adding a strong loop at the top using a chain stitch and slip stitch combination.
For extra durability outdoors, stitch a loop using jute or nylon cord.

How to Crochet a Sunflower Granny Square

Large 3d Crochet Sunflowers Bouquet (FREE Pattern)

Sunflower Bucket Hat Crochet Pattern FREE


Crochet Sunflower Keychain Pattern FREE (Easy, Step By Step)

Small Hanging Basket with sunflowers FREE Crochet Pattern

Sunflower Windspinner Crochet Pattern FREE

Sunflower Coaster & Crochet Basket Set FREE pattern

Sunflower Crochet Applique Pattern FREE

Sunflower Cross Body Bag (Easy Pattern FREE)

Sunflower Crochet Cardigan Pattern (FREE step by Step)
Please READ FULL TERMS and Conditions of USE HERE
Thank you for visiting my website or purchasing a pattern.
It helps me to maintain the website and buy new materials to make even more FREE CROCHET PATTERNS.
As always you are free to make and sell items you have made from the pattern.
You MUST acknowledge LisaAuchCrochet as the original designer.
YOU will NOT copy or distribute the pattern online TEXT OR PDF, in part or whole anywhere else,
NO Factory Distribution nor mass production of any kind.
Happy Crocheting (c)All Rights Reserved LisaAuchCrochet