How to Crochet a Daisy Granny Square Pattern: Free 12 Petal Flower Square.
This free crochet daisy granny square pattern will show you exactly how to crochet a beautiful 12-petal flower granny square using easy stitches and simple step-by-step instructions with a written printable pdf!

Daisy granny squares have become one of the most popular crochet motifs, and it’s easy to see why.
Confident in crochet? Beginners continue reading
Disclosure: This post may contain affiliate links. I may earn a small commission at no extra cost to you. All opinions are my own.
Their cheerful flower centre and classic granny square design make them perfect for creating colourful handmade projects
Whether you’re making your very first granny square or adding another design to your growing collection, this easy crochet pattern is fun, relaxing, and works up surprisingly quickly.
Once you’ve made one, you’ll soon have a whole stack of daisy squares ready to turn into something beautiful.
These crochet flower granny squares are incredibly versatile.
- Skill Level: Easy / Confident Beginner (3 double crochet stitches partially finished then worked together (3dctog = cluster
- Finished Size: (insert your measurement)
- Yarn: DK / Light Worsted (#3)
- Hook: 4.0 mm (or your recommended size)
- Terminology: US Crochet Terms
- Construction: Crochet flower center first, then work the granny square around it
- Best For: Crochet bags, blankets, cardigans, bucket hats, cushions, and home décor
They can be joined together to create crochet bags, granny square tote bags, bucket hats, blankets, cardigans, cushion covers, table runners, scarves, baby blankets, and even home décor projects.
It is just so pretty its one of those crochet squares you’ll find yourself coming back to again and again.
I originally designed these daisy granny squares for my popular Daisy Granny Square Bag pattern, where just 13 squares create a beautiful everyday crochet bag, and I wanted the leaves of the daisy petals to sit flat.
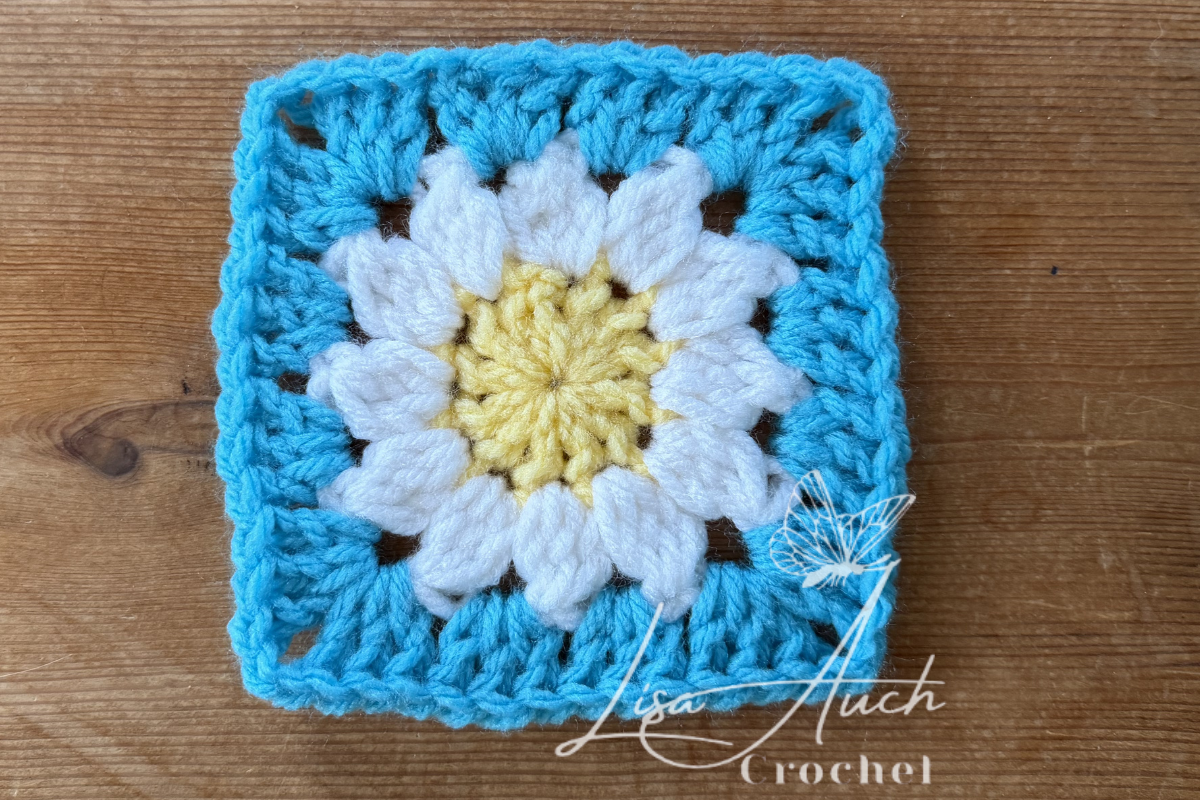
Since then, I’ve used the same square in several other projects because it joins together so neatly and always creates such a lovely finished effect.
This pattern is written in US crochet terms and includes plenty of photographs to help guide you through each stage.
Daisy Flower Square Summary
- The square is worked in four simple stages.
- You’ll begin by crocheting a small yellow centre before adding twelve white daisy petals.
- Once the flower is complete, you’ll crochet the background colour around the petals to turn the circle into a traditional granny square.
- From there you can continue adding granny rounds to make larger squares if required.
What Can You Make With these Daisy Granny Squares?
One of my favourite things about this square is how versatile it is. Once you’ve mastered the pattern, you can use it for so many different crochet projects.
- Granny square bags
- Bucket hats
- Baby blankets and Throws
- Cardigans Sweaters
- Cushions
Materials You’ll Need
One of the things I love most about this daisy granny square is that it doesn’t require many supplies. It’s a great stash-busting project and the perfect way to use up leftover yarn from previous crochet projects.
For my sample square, I used three colours to create the traditional daisy look, but don’t be afraid to experiment with different colour combinations. Bright flowers, pastel shades, autumn colours, or even a single-colour design all create a completely different look.
Yarn
For this pattern, I used DK (Light Worsted #3) yarn in three colours:
- Yellow for the flower centre
- White for the daisy petals
- Green (or your chosen background colour) for the granny square
You can substitute any DK weight yarn, cotton, acrylic, or a cotton blend depending on the project you’re making.
If you’re planning to make a crochet bag, I recommend using a good-quality cotton yarn as it gives the squares more structure and durability. For blankets, cushions, and garments, acrylic or blended yarns are equally beautiful and wonderfully soft.
Crochet Hook
- 4.00 mm (G/6) crochet hook
Or use the hook size needed to obtain the finished size you require.
Other Supplies
You’ll also need:
- Yarn needle for weaving in the ends
- Sharp scissors
- Stitch markers (optional, but useful if you’re still learning)
Finished Size
The exact size may vary depending on your yarn choice, hook size, and personal crochet tension.
Crochet Abbreviations (US Terms)
This pattern is written using US crochet terminology.
The following abbreviations are used throughout the pattern:
- ch – chain
- sl st – slip stitch
- st – stitch
- sp – space
- dc – double crochet
- dc3tog – double crochet 3 together
- rnd – round
- rep – repeat
Special Stitch – Double Crochet 3 Together (dc3tog)
- The daisy petals are made using a double crochet 3 together (dc3tog) cluster.
- Don’t worry if you’ve never worked a dc3tog cluster before.
- After the first couple of petals you’ll quickly get into a rhythm.
To make a dc3tog (cluster):
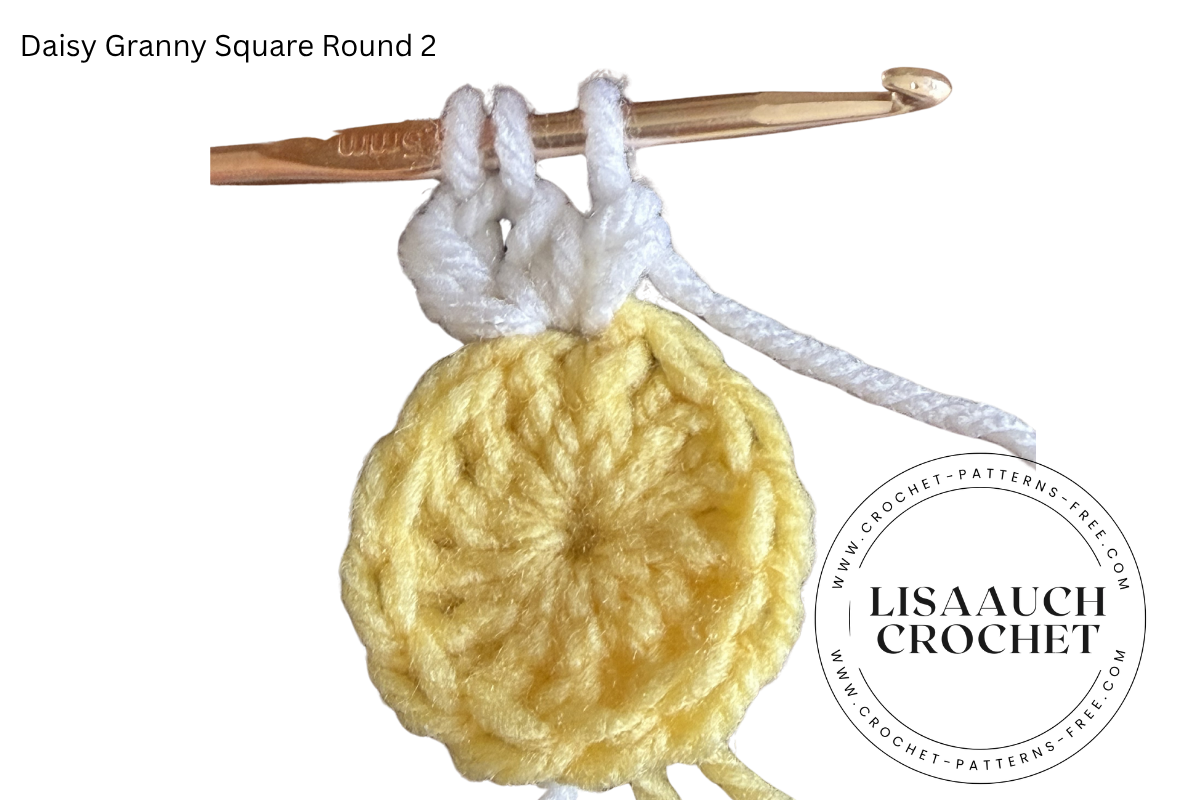
- Yarn over and insert your hook into the stitch.
- Yarn over and pull up a loop.
- Yarn over and pull through two loops.
- Repeat Steps 1–3 twice more in the same stitch.
- You will now have four loops remaining on your hook.
- Yarn over and pull through all four loops to complete the cluster.
Each completed cluster forms one daisy petal when separated by the chain spaces in Round 2.
Pattern Notes
Before you begin, here are a few helpful tips:
- Read through the pattern before starting.
- The pattern is worked in joined rounds.
- Join each round with a slip stitch unless otherwise stated.
- Change colours at the end of each round for the neatest finish.
- Keep your tension even throughout the project.
- Blocking your finished squares before joining them together will give a flatter, more professional finish.
- If you’re making multiple squares for a blanket, bag, or cardigan, try to keep your tension consistent so every square finishes the same size.
- Weave in ends as you change colours. Block before joining.
I Love this Daisy Flower Granny Sqaure and you will too
There are hundreds of granny square patterns available, but this one remains one of my favourites because it’s:
- Quick to crochet
- Uses small amounts of yarn
- Beginner friendly
- Easy to customise with different colours
- Perfect for stash busting
- Great for bags, blankets and garments
- Joins beautifully with other squares
- Square Blanket of Daisies
Crochet Projects Made with This Daisy Granny Square
Once you’ve crocheted a few squares, here are some of my favourite projects you can make next.
How to Crochet a Daisy Granny Square
If you are a confident croch,eter jump down to the super easy written daisy granny square pattern below.
Now that you have your yarn (color a, color b, color c) and hook ready, it’s time to start crocheting your daisy granny square.
We’ll begin by making the flower centre, then crochet the daisy petals before turning the flower into a traditional granny square.
- If you’re new to colour changes, don’t worry.
- Each round is worked separately, making this an ideal pattern for practising changing yarn colours.
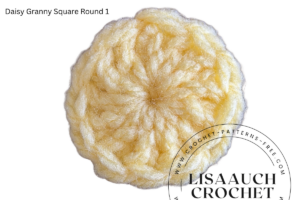
Round 1 – Crochet the Daisy Centre
Using yellow yarn:
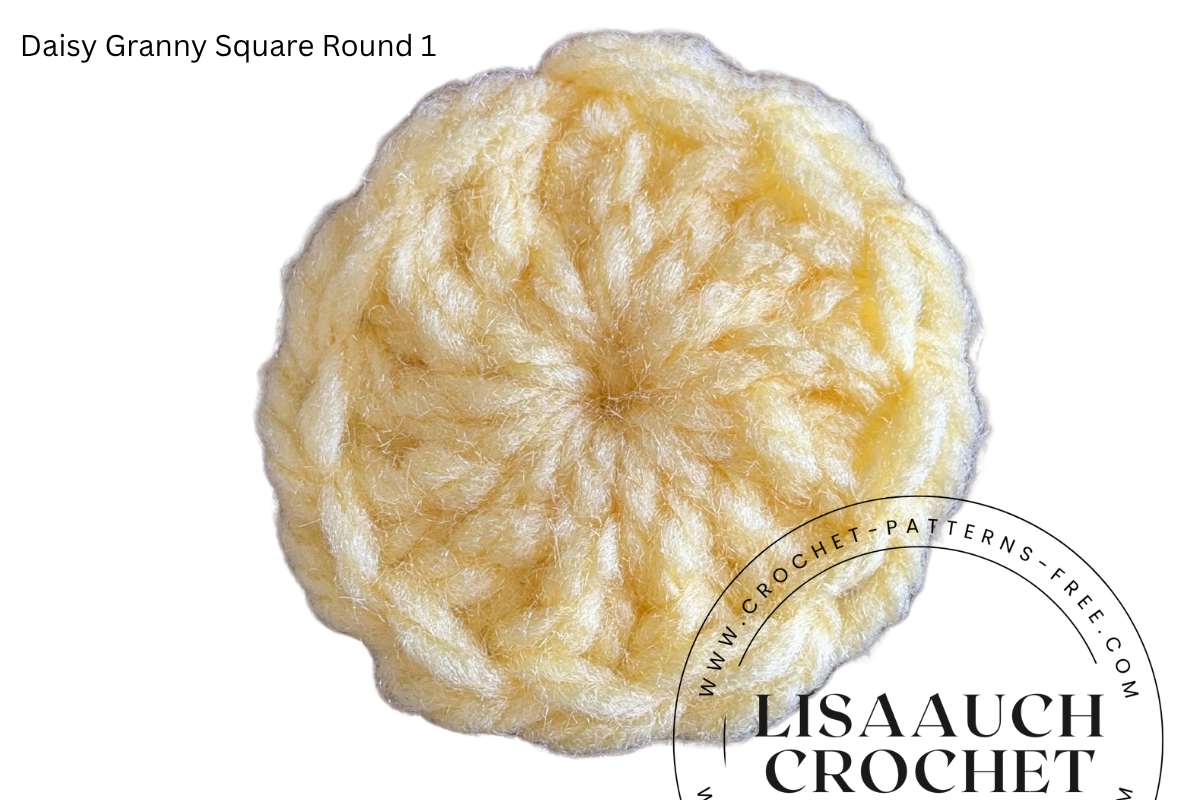
- Starting with a slip knot Chain 3, and join with a slip stitch to form a ring, or to have a tight center, Ch 3, and work the first round into the First chain
- Work 12 double crochets into the centre of the ring. (12 dc stitches)
- Join with a slip stitch to the top of the beginning chain 3.
- Fasten off.
You should now have 12 double crochet stitches forming the centre of your daisy.
Round 1 Tips
- Pull the centre tightly closed
- Keep your stitches evenly spaced around the ring.
- Don’t worry if the centre cups slightly. It will flatten as you continue crocheting.
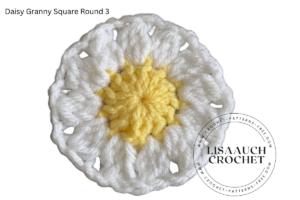
Round 2 – Crochet the Daisy Petals
Each petal is made using a dc3tog cluster.
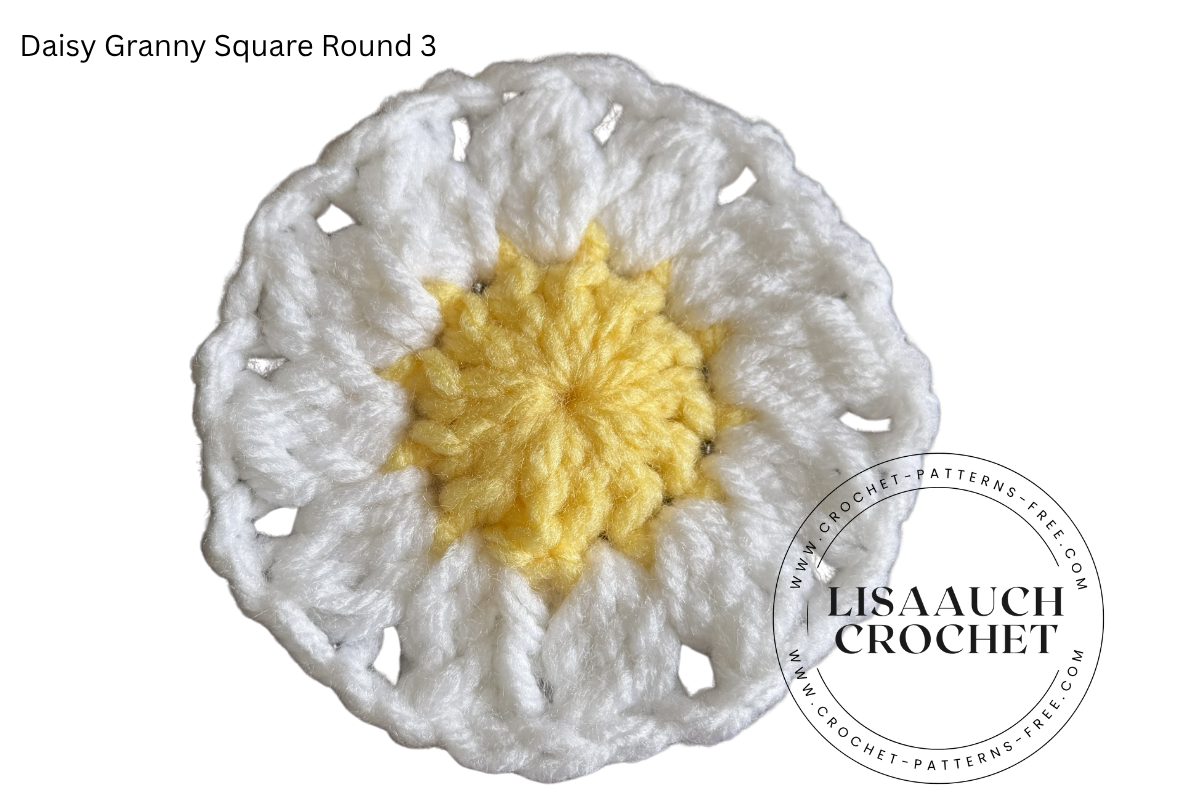
- Join your white yarn into any stitch. ch3 (counds as first partial dc of the 3dctog cluster, 2further partial double crochets (3 loops on hook), yarn over pull through to complete 1st cluster
- Chain 2.
- Work another dc3tog cluster into the next stitch.
- Chain 2.
- Repeat around the circle until you have worked a petal into every stitch.
- Join with a slip stitch to the top of the first cluster.
- Fasten off.
- You should now have 12 daisy petals surrounding the yellow centre.
Round 2 Tips
- Don’t make the chain spaces too tight.
- Keep each cluster roughly the same height.
- If your flower starts to ripple slightly, don’t worry. The granny square rounds will pull everything into shape.
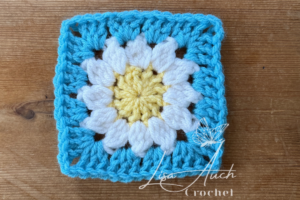
Round 3 – Turning the Flower into a Granny Square
This is where the magic happens!
- Join your background colour into any chain-2 space.
- You’ll now begin working traditional granny groups around the flower.
- Three of the chain spaces become the sides of your square, while every third space becomes a corner.
- Make sure each corner contains the correct corner stitches. Take your time during this round, making sure you have evenly spaced corners of (3dc, ch2, 3dc) worked into the chain space
- As you work around the flower, you’ll see the round daisy gradually transform into a square.
- Count your granny groups before joining the round.
- Don’t pull the corner stitches too tightly, as this can make the square curl, chain 3 if you need to.
- Round 3: Join new yarn in ANY ch2, space, and chain 3, (counts as first dc of 3dc work a further 2 double crochet into same space, in the nxt ch2, space work 3dc sts, in the next ch2 space work CORNER of 3dc, ch2, 3dc)
- 3dc in the next ch2 space, (TWICE), in the next cha2 space (CORNER 3dc, ch2, 3dc)
How to Make the Square Bigger – Continue Growing Your Granny Square
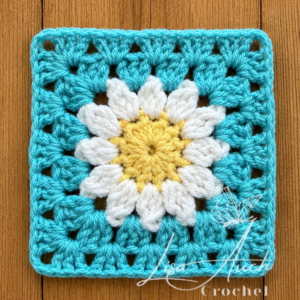
Once your flower has become a square, you can continue adding as many granny rounds as you like.
Each additional round follows the traditional granny square pattern:
- Work 3 double crochet into every side space.
- Work (3 double crochet, chain 2, 3 double crochet) into each corner.
- Repeat around until your square reaches the desired size.
Pro Tip: want to crochet these Granny Sqaures Fast?
If you’re making multiple daisy granny squares for one project, crochet all of the centres first, then all of the petals, before completing the square rounds.
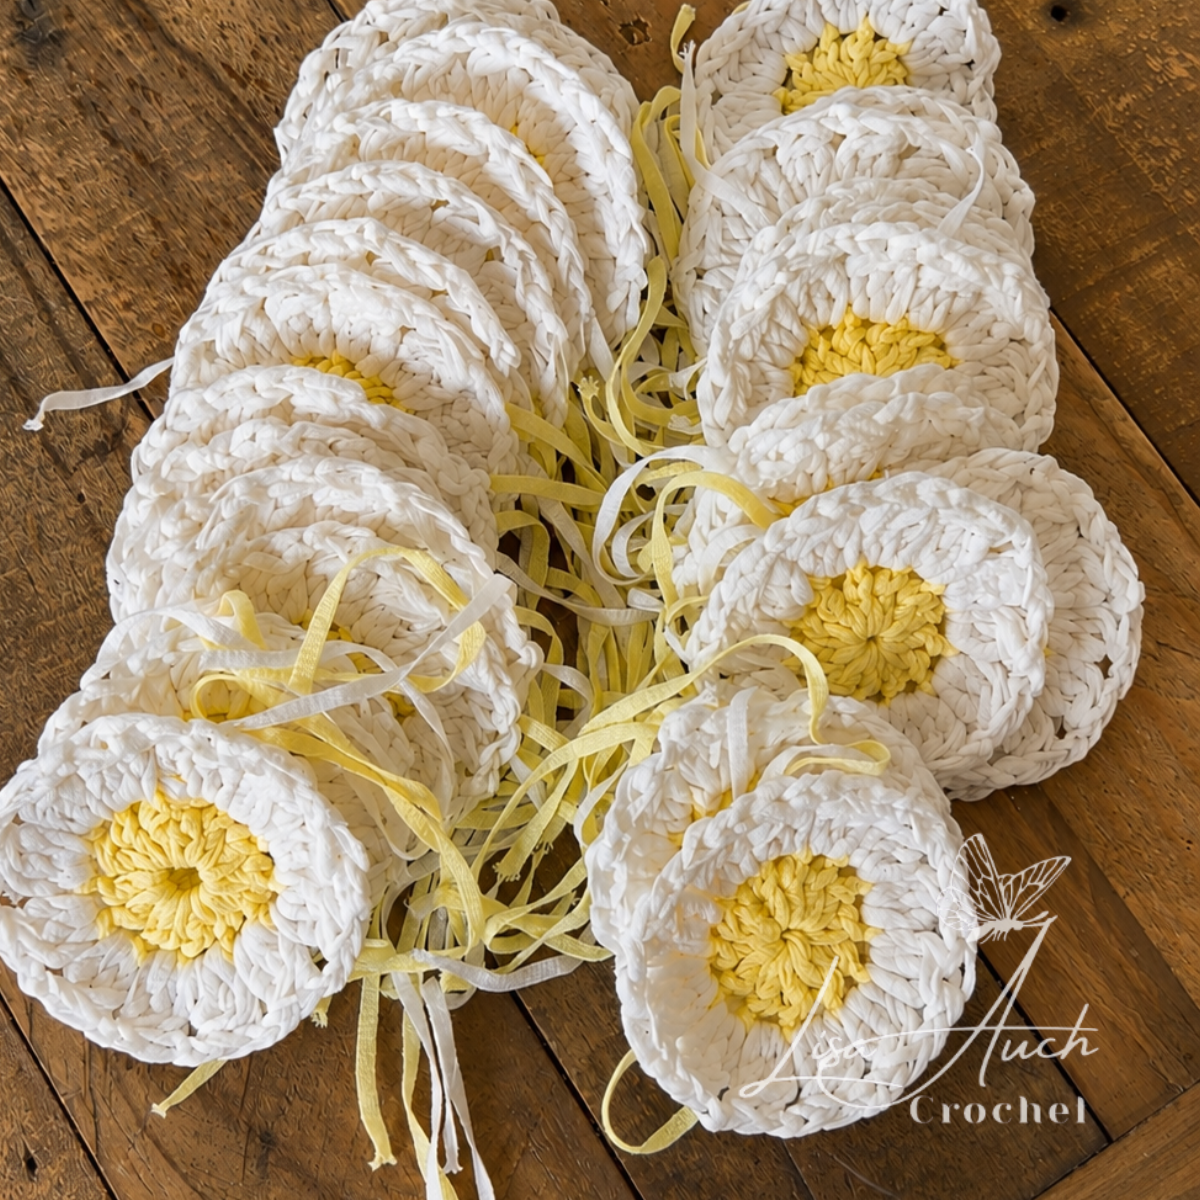
Working in batches saves time and helps keep every square looking consistent.
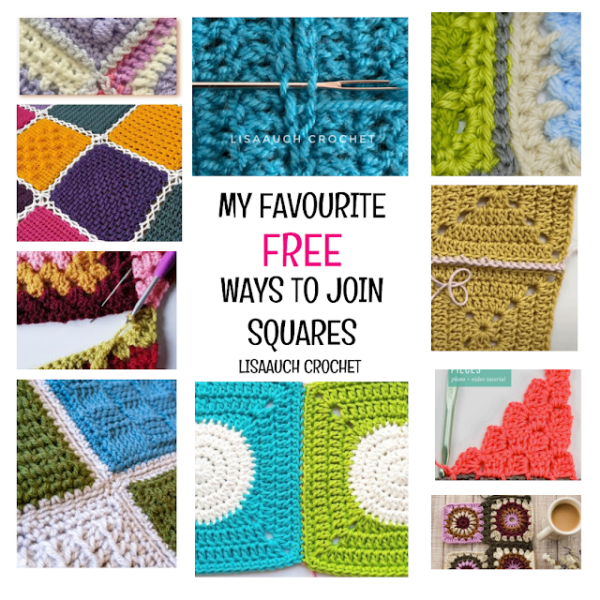
If you want to join your Granny Squares I usually use the Mattress stitch, but these are also some of my favourite joining methods
Can beginners crochet a daisy granny square?
Yes! This daisy granny square pattern is suitable for confident beginners who already know a few basic crochet stitches. If you can make a chain, double crochet, and slip stitch, you’re well on your way.
The only new technique you’ll learn is the dc3tog (double crochet 3 together) cluster stitch, which creates the daisy petals. It may feel a little unusual at first, but after crocheting the first few petals, you’ll quickly find your rhythm.
I’ve included step-by-step instructions and clear photos to guide you through every round, from crocheting the flower centre to turning it into a traditional granny square. Take your time, follow each round carefully, and before you know it, you’ll have a beautiful daisy granny square ready to use in your next project.
However If you’re completely new to crochet, I recommend practising basic stitches first before trying this pattern. Once you’re comfortable with double crochet and changing yarn colours, this flower granny square is a fun next step and a great way to build your confidence.
Printable Daisy Flower Granny Square Crochet Pattern
Daisy Flower Granny Square Crochet Pattern free
Instructions
- Center of flowerRound 1: Begin ch 3, work 12 dc into the FIRST chain on hook, slip stitch to join (12dc)
- Daisy leavesRound 2: Ch 3 (counts as 1 dc), 2 incomplete dc into the same space, yarn over and pull through all loops, in the next ch space *ch 2, 3 dctog cluster made).*, repeat ** 12 times in total, ch 2, end with a slip stitch into the top of the first Daisy leaf (12 double crochet clusters in total).
- Outer Granny Square edgeRound 3: Ch 4, 2 dc, ch 2, 3 dc into the same chain space (=corner), ch 1, (3 dc into next chainspace, ch 1) x2, (3 dc, ch 2, 3 dc) in the next chain space (=corner), ch 1, (3 dc into next chainspace, ch 1) x2, (3 dc, ch 2, 3 dc) in the next chain space (=corner), ch 1, (3 dc into next chainspace, ch 1) x2, (3 dc, ch 2, 3 dc) in the next chain space (=corner), ch 1, (3 dc into next chainspace, ch 1) x2, sl st in 4 ch.
- TO MAKE BIGGER continue working adding 1 3dc set in each side Round 4: Ch 3, *(3 dc, ch 2, 3 dc) into the corner space, 3 dc between each group of dc to thenext corner space*, repeat *-* 4 times in total, (in the last group of dc of the round the 3rd dc isreplaced with the chain 3 from the beginning of the round, sl st in 3 ch.
Notes
Ready to turn your granny squares into a bag?
Once you’ve crocheted 13 daisy granny squares, follow my free Daisy Granny Square Bag Pattern, complete with joining instructions, bag layout diagrams, and finishing tips.
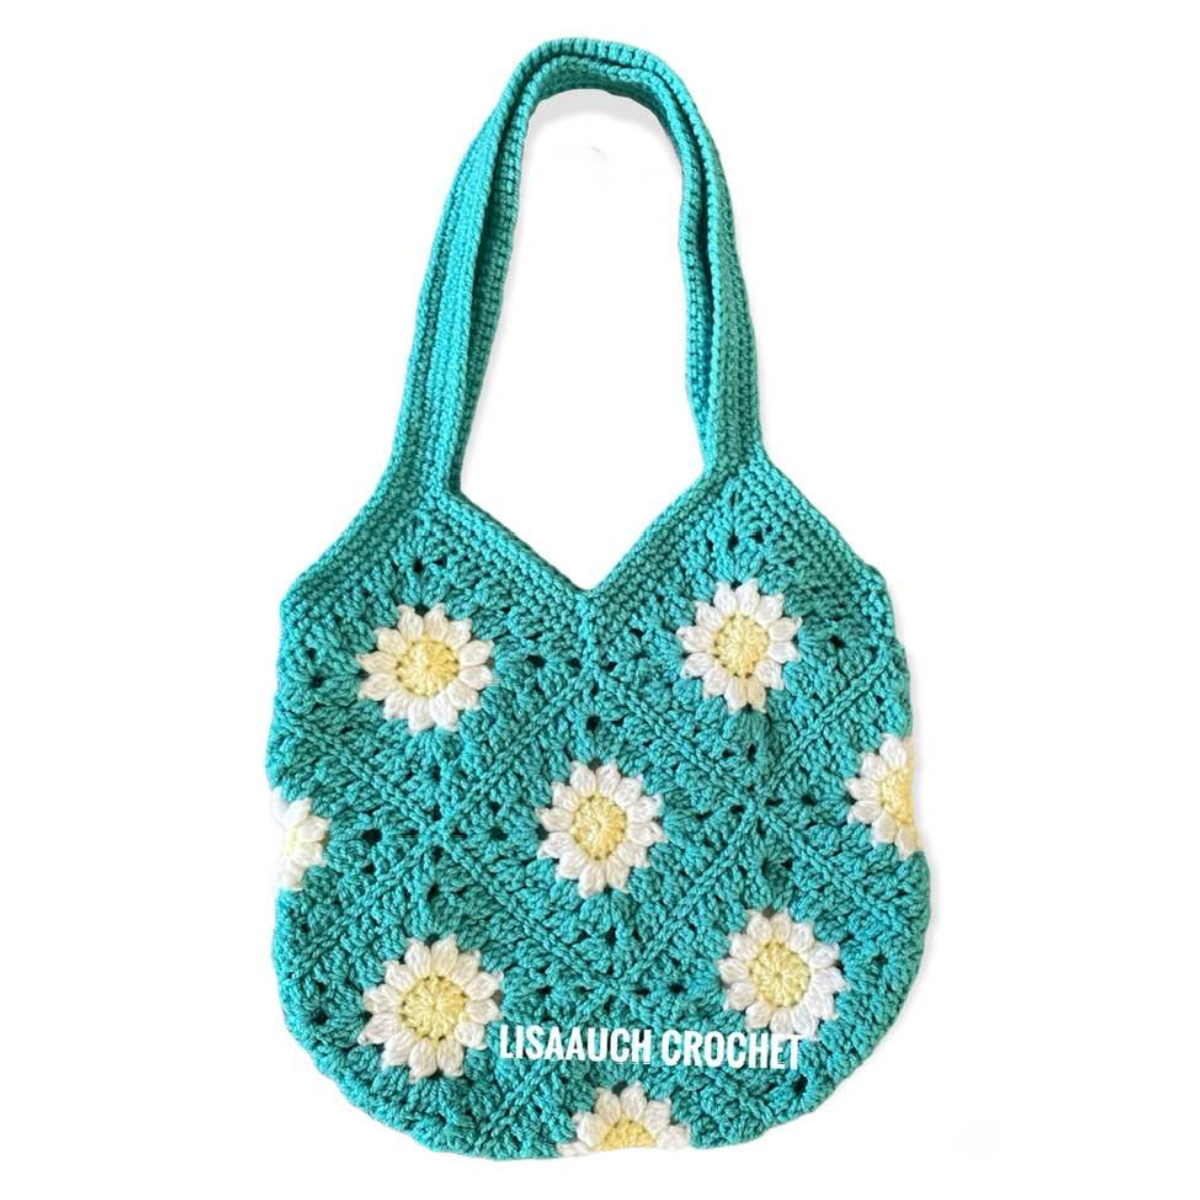
I originally designed these daisy granny squares for my popular Daisy Granny Square Bag pattern, where just 13 squares create a beautiful everyday crochet bag.
Since then, I’ve used the same square in several other projects because it joins together so neatly and always creates such a lovely finished effect. (see my Page here for my favourite Joining methods for Granny Squares




You may make and sell finished items made from this pattern. Please credit LisaAuchCrochet as the original designer.
You may not copy, rewrite, reproduce, redistribute, republish, or upload this pattern, in whole or in part, in any format, including as text, PDF, AI-generated or AI-rewritten content, within an app, or as a video tutorial.
You may not use Reader Mode, Print View, Save as PDF, screenshots, content-extraction tools, or any other method to bypass or remove advertising from this website and then upload, import, reproduce, or make the pattern available through another app, website, platform, or service.
All LisaAuch Crochet photographs and images are copyrighted. You may not copy, download, crop, edit, alter, republish, or use these images except as expressly permitted by the LisaAuch Crochet Pattern Use & Copyright Policy.
Factory production and mass manufacturing of items made from this pattern are not permitted.
For full details, please see:
Happy Crocheting! © All Rights Reserved LisaAuchCrochet