How to Crochet a Daisy Granny Square Bag (Free Pattern + Tutorial)
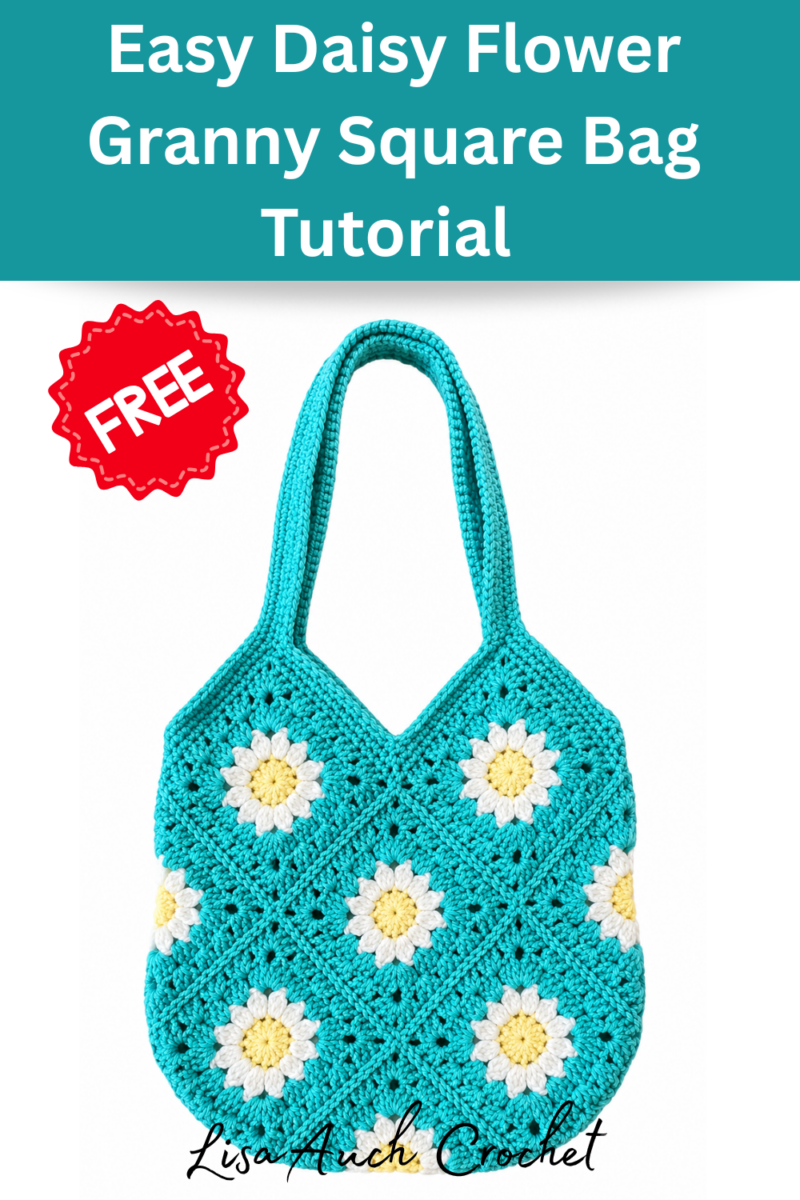
Learn how to crochet a Daisy Granny Square Bag. This free crochet pattern will show you exactly how to make one using just 13 daisy granny squares.
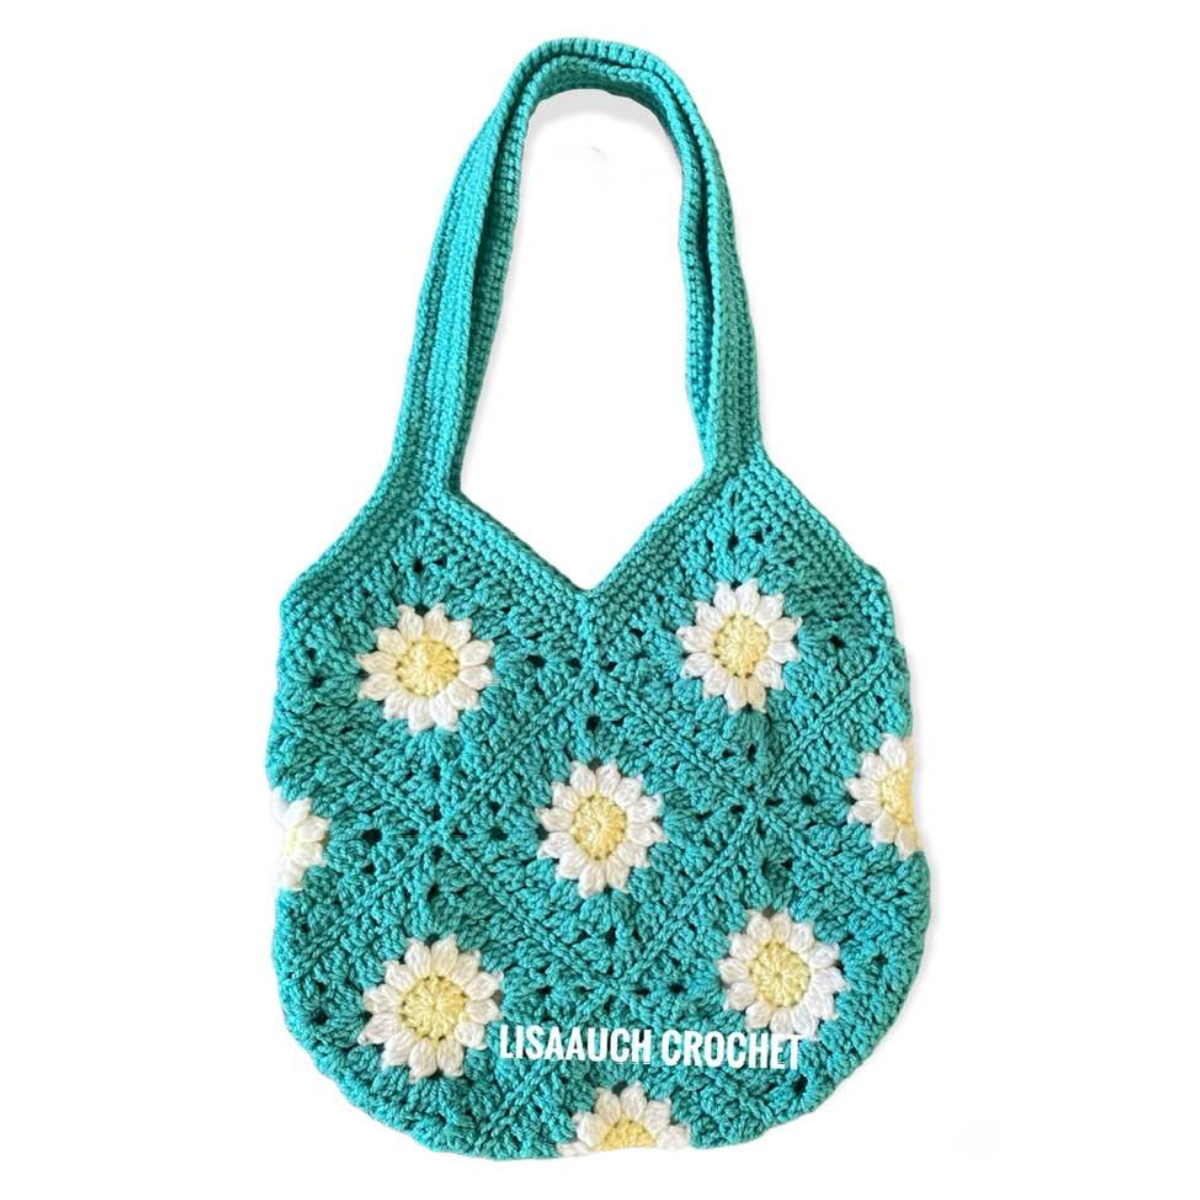
With step-by-step instructions, clear photos, and easy bag layout diagrams, you’ll have everything you need to create a beautiful bag you’ll love to use.
You can Buy an AD free PDF Crochet Daisy Bag Pattern directly from @Ravelry HERE
Disclosure: This post may contain affiliate links. I may earn a small commission at no extra cost to you. All opinions are my own.
This is a beginner-friendly tutorial to guide you through every stage of crocheting a bag from granny squares, the bag layout, to joining them together and adding the handles.
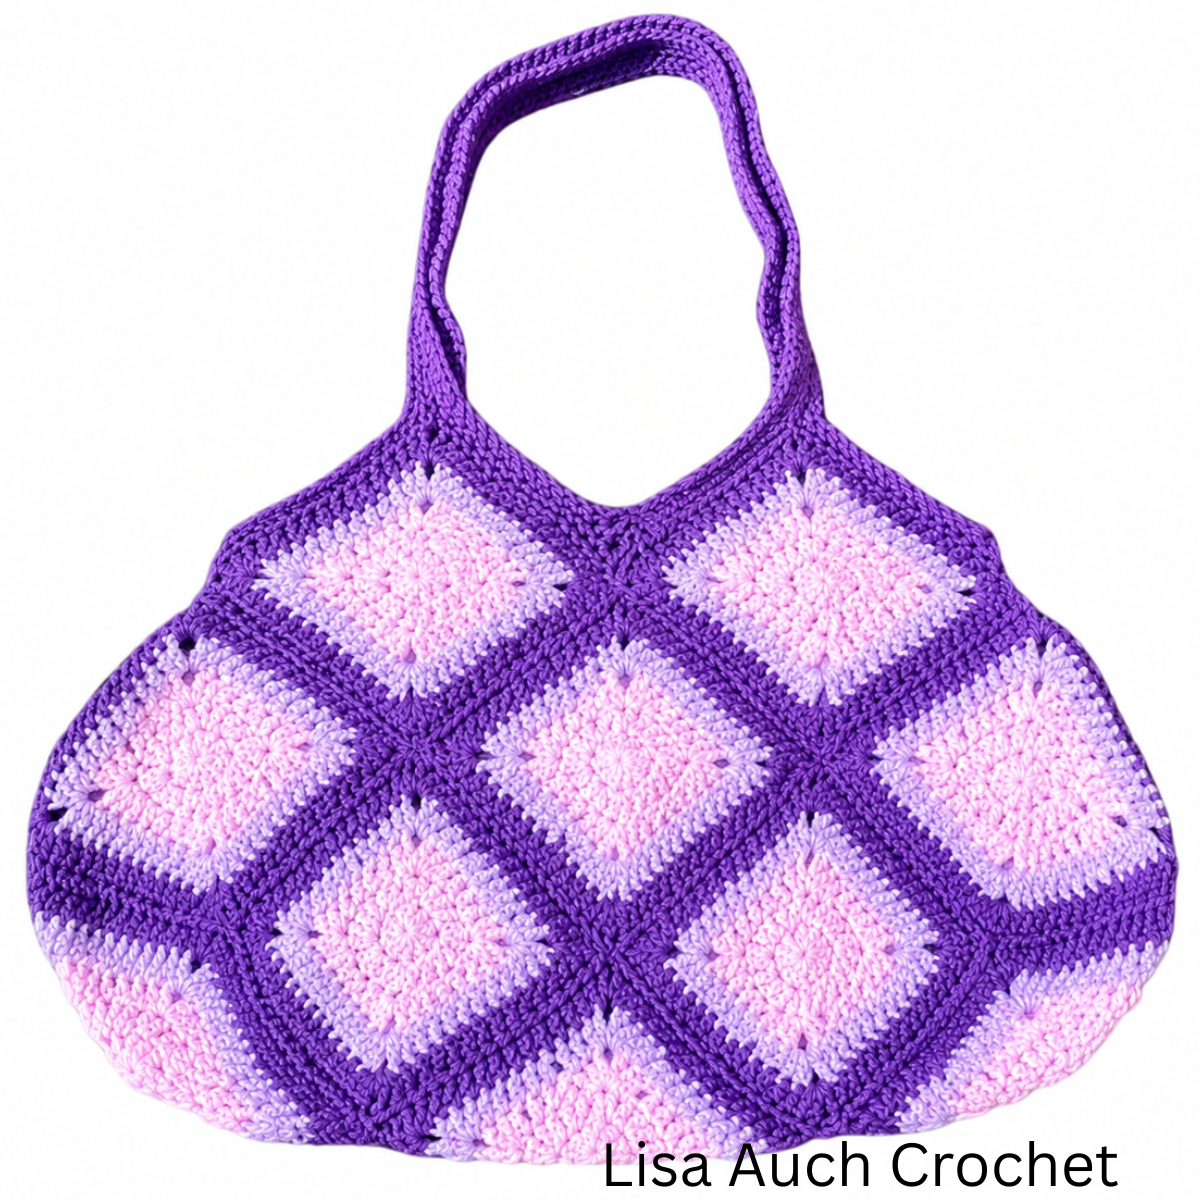
I have also added in more granny square bag layouts for you if you want to create a different bag style.
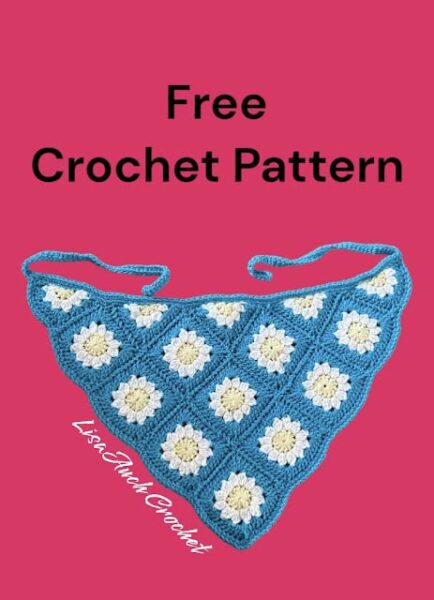
You’ll also find plenty of step-by-step photos, layout of the bag, helpful tips, and links to more fun patterns that use the free daisy granny square pattern, like the daisy bucket hat, or daisy bandana to inspire your next project.
Daisy Granny Square Bag at a Glance
- Pattern: Free Daisy Granny Square Bag Crochet Pattern
- Skill Level: Easy, You will know how to crochet a 3dc together cluster st
- Crochet Terms: US Terminology
- Construction: 13 Daisy Granny Squares joined to create the bag
- Finished Bag: (excluding handles)Is going to depend on your choice of yarn and Hook
- Yarn: DK (Light Worsted #3) Cotton Yarn
- Hook: 5.50 mm (I-9) I I have made this bag slightly smaller using a 4.5mm hook, perfect for over the shoulder tote
- Notions: Yarn needle, scissors, stitch markers (optional)
- Gauge: Each finished granny square measures approximately XX inches
- Optional: Fabric lining, magnetic clasp or zip, alternative bag handles
Why You’ll Love This Daisy Granny Square Bag
- Uses just 13 granny squares for quick assembly. The squares can be made super quick, I make several in one sitting and love using up my scraps of yarn.
- Beginner-friendly with step-by-step photos and diagrams, and bag layout ideas
- A great stash-busting crochet project.
- Easy to customize with different colours and handles.
- Perfect for everyday use, shopping, holidays, or carrying your crochet projects.
- Includes links to more daisy granny square patterns and granny square bag ideas.
Materials You’ll Need
This Daisy Granny Square Bag is crocheted using DK (Light Worsted #3) yarn and a 5.50 mm (I-9) crochet hook.
While a smaller hook creates a more compact shoulder bag, I chose a larger hook for this version to give the granny squares a softer drape and create a roomier everyday tote without changing the pattern.
Yarn
- DK (Light Worsted #3) yarn or even worsted weight level yarn, Iused DK (Light Worsted #3) yarn and a 5.50 mm (I-9) crochet hook
- (USE the recommended hook size) of your chosen colours
- Main colour
- Daisy petal colour
- Daisy centre colour
Recommended fibres:
- Cotton for a sturdy bag with excellent shape.
- Acrylic for a softer, lighter bag with more drape.
- Cotton blends if you’d like a balance of both.
Hook
- 5.50 mm (I-9) crochet hook
Notions
- Yarn needle
- Scissors
- Measuring tape
- Stitch markers (optional)
Optional Extras
- Wooden, bamboo, leather, or crocheted handles
- Fabric lining
- Magnetic clasp or zip
Before You Start
Before you begin crocheting your Daisy Granny Square Bag, there are a few things worth knowing that will help your finished bag look its best.
This bag is made from 13 daisy granny squares, so taking a little extra care with each square will make assembling the bag much easier later on.
- Crochet all of your granny squares using the same hook size and yarn to keep them consistent.
- Weave in your yarn ends as you finish each square. It’s much easier than leaving them until the end.
- If your granny squares vary slightly in size, gently block them before joining. (SEE joining Method Below)
- Lay out all 13 squares following the bag layout diagram before sewing or crocheting them together.
- Take your time when joining the squares. Accurate joins will give your bag a neat, professional finish.
💜 Lisa’s Top Tip: Even if your granny squares only differ by a few millimetres, blocking them before assembly makes a huge difference. I always block my squares first because it gives the finished bag straighter seams, sharper corners, and a much more professional shape.
Crochet the Classic Daisy Granny Squares for the Bag
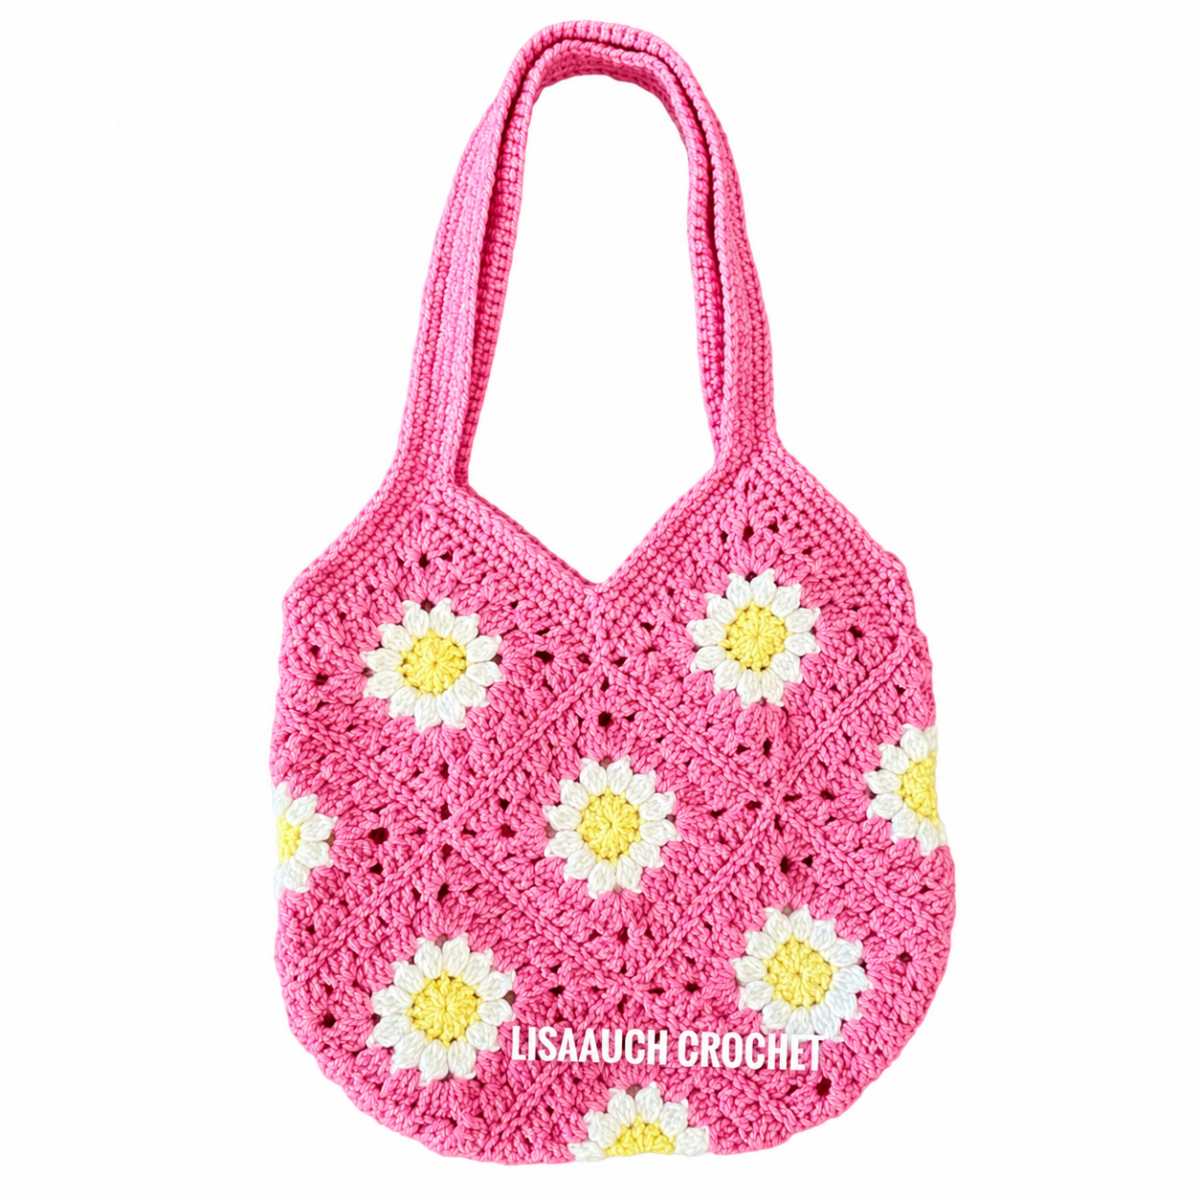
Every bag begins with the classic Daisy Granny Square. For this project, you’ll crochet 13 identical granny squares before assembling the bag.
Using the same yarn and 5.50 mm (I-9) crochet hook throughout will help keep all of your squares the same size, making assembly much easier.
The written pattern below shows you exactly how to crochet each daisy granny square.
Follow the step-by-step instructions until you’ve completed all 13 granny squares, then continue to the bag layout and assembly section.
Before You Crochet the Daisy Granny Square
Before you begin, you’ll need to be familiar with the following basic crochet techniques using US crochet terminology:
- Chain (ch)
- Slip Stitch (sl st)
- Sc , single crochet – Single crochet stitches
- Double Crochet (dc)
- Changing yarn colours
- Working into chain spaces
- working multiple part finished stitches together, 3dctog
If you’re comfortable with these stitches, you’ll have no trouble following this step-by-step tutorial.
Pattern Notes
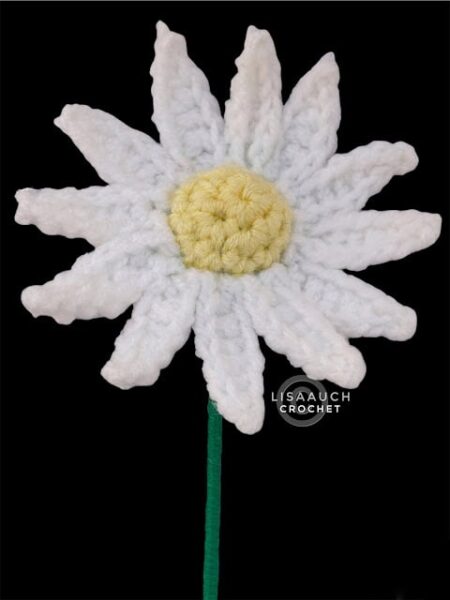
Throughout this pattern, the flower petals are made using a 3 Double Crochet Cluster, abbreviated as dc3tog.
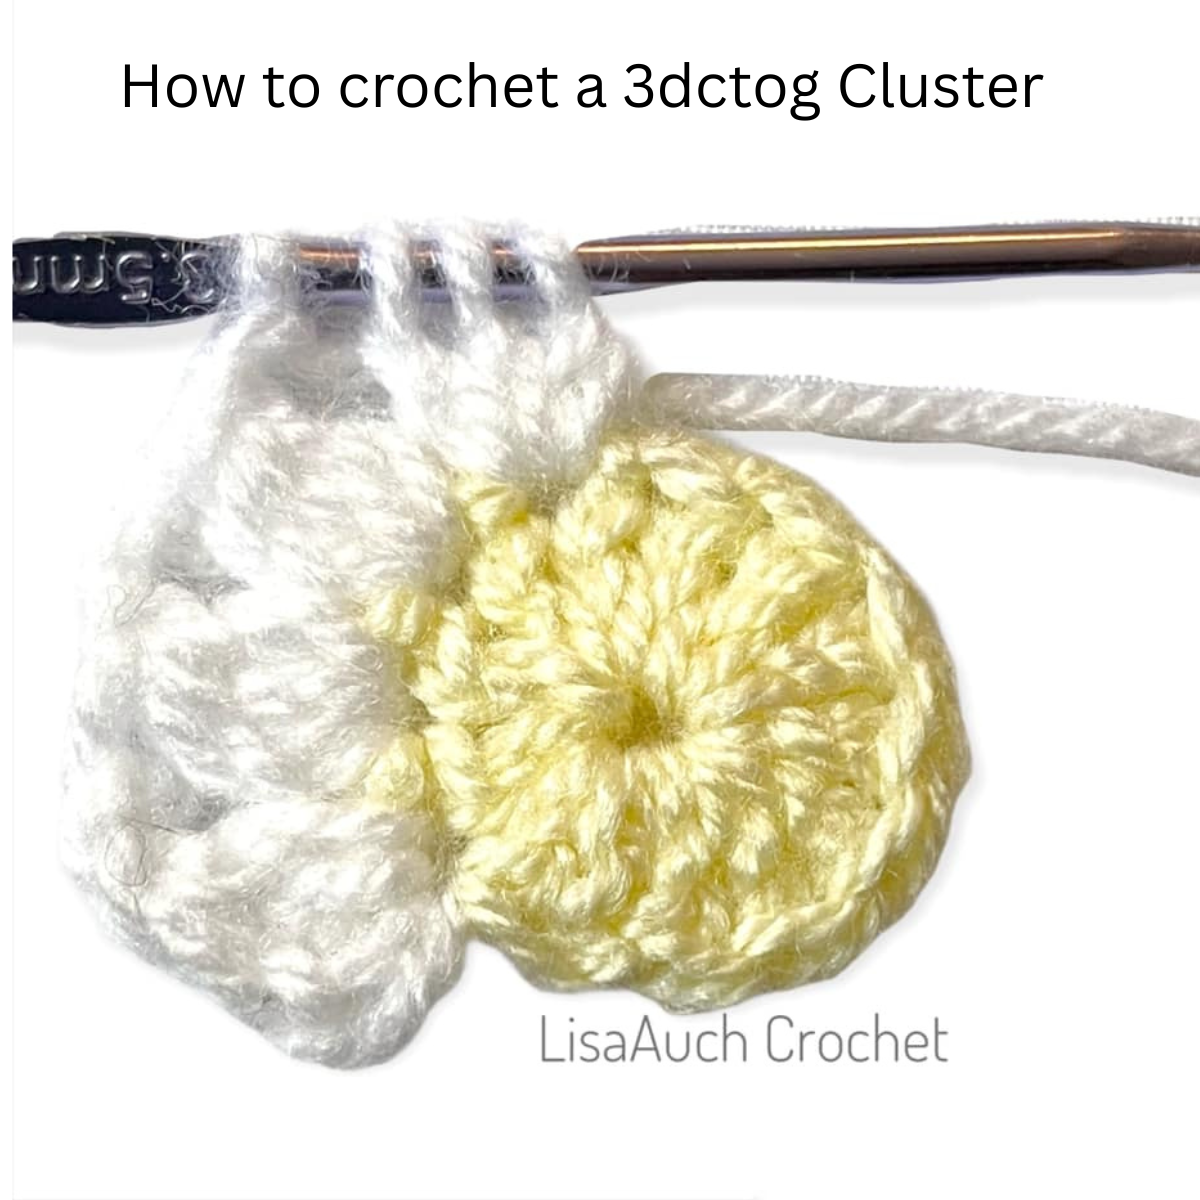
How to Crochet a dc3tog (3 Double Crochet Cluster)
- Yarn over and insert hook into the next stitch or chain space.
- Yarn over and pull up a loop.
- Yarn over and pull through the first 2 loops only.
- Repeat Steps 1 to 3 two more times in the same stitch or space.
- You will now have 4 loops remaining on your hook.
- Yarn over and pull through all 4 loops to complete the dc3tog cluster.
How to Crochet the daisy 12 Petal Granny Sqaure in 4 easy Steps
step 1: Crochet the Daisy Centre
The centre of the daisy is worked in the round using your chosen centre colour.
Rnd 1: Ch2. 12 dc into the 1st chain on the hook, slip to top of ch3 to join (12sts)
Change to White (or your preferred colour) and join with a slip stitch in any st to start
Petals (White)
You will work 12 dc3tog clusters, one in each stitch around.
Rnd 2: Join white in any stitch. Ch2, dc3tog in same st, ch2. Work dc3tog, ch2 in each of the remaining 11 sts. Sl st to join. Fasten off. (You now have 12 petals separated by ch‑2 spaces.)
Turning your Daisy Into a Granny Square
**Note you can add as many rounds as you wish to make the square bigger.
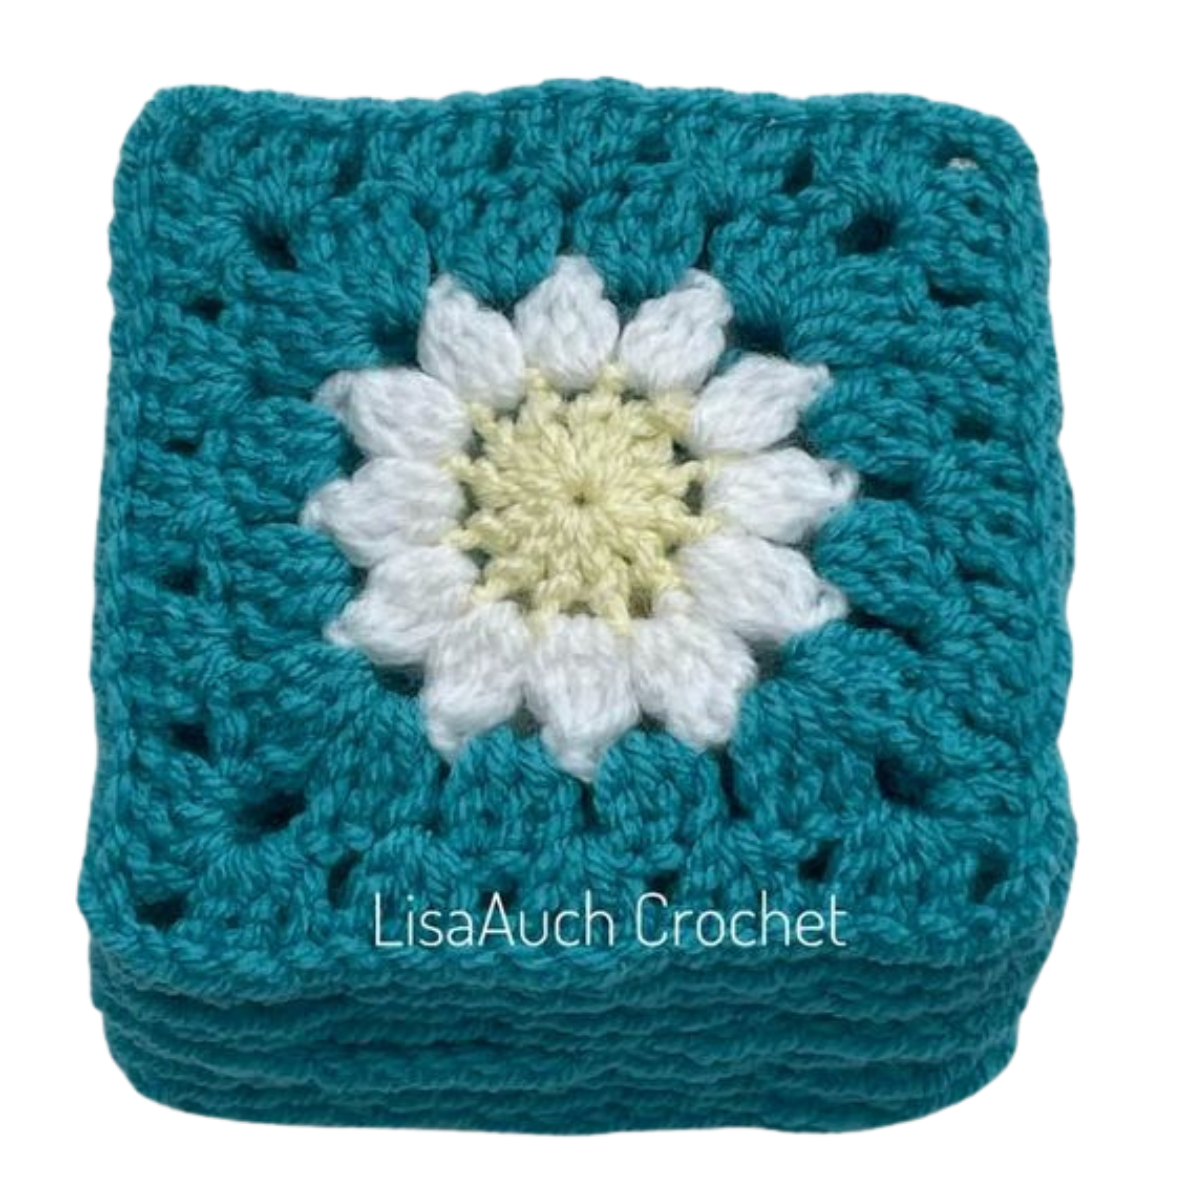
Square Round 1 (Your chosen background colour)
Join yarn in any ch‑2 space.
Rnd 3: Ch3 (counts as dc), 2dc in same space. Work 3dc in next space. (3dc, ch2, 3dc) in next space (corner). 3dc in next 2 spaces, (3dc, ch2, 3dc) in next space (corner) Repeat from * to * around. Sl st to join.
Square Round 2
Slip stitch across to the next space.
Rnd 4: Ch3, 2dc in same space. Work 3dc in next 3 spaces. (3dc, ch2, 3dc) in corner space. 3dc in next 3 spaces, (3dc, ch2, 3dc) in corner Repeat around. Sl st to join.
To Make the Square Larger
Each new round adds one extra 3dc group per side. Continue adding rounds by working:
- 3dc in each space along the sides
- (3dc, ch2, 3dc) in each corner
Before making the remaining squares, take a moment to check that your square is lying flat and all four sides are even. If needed, gently shape or block the square to help it sit neatly.
Using the same yarn, hook, and tension throughout the project will help ensure every granny square finishes the same size, making the bag much easier to assemble.
Starting the BagLay out
Crochet the Remaining Granny Squares ()x13
- Continue crocheting until you have 13 identical Daisy Granny Squares.
- As you finish each square, weave in your yarn ends before starting the next one.
- It only takes a few extra minutes and makes assembling the bag much quicker later on.
- Once all 13 squares are complete, you’re ready to arrange them into the bag layout.
Step 2: Understanding the Bag Layout
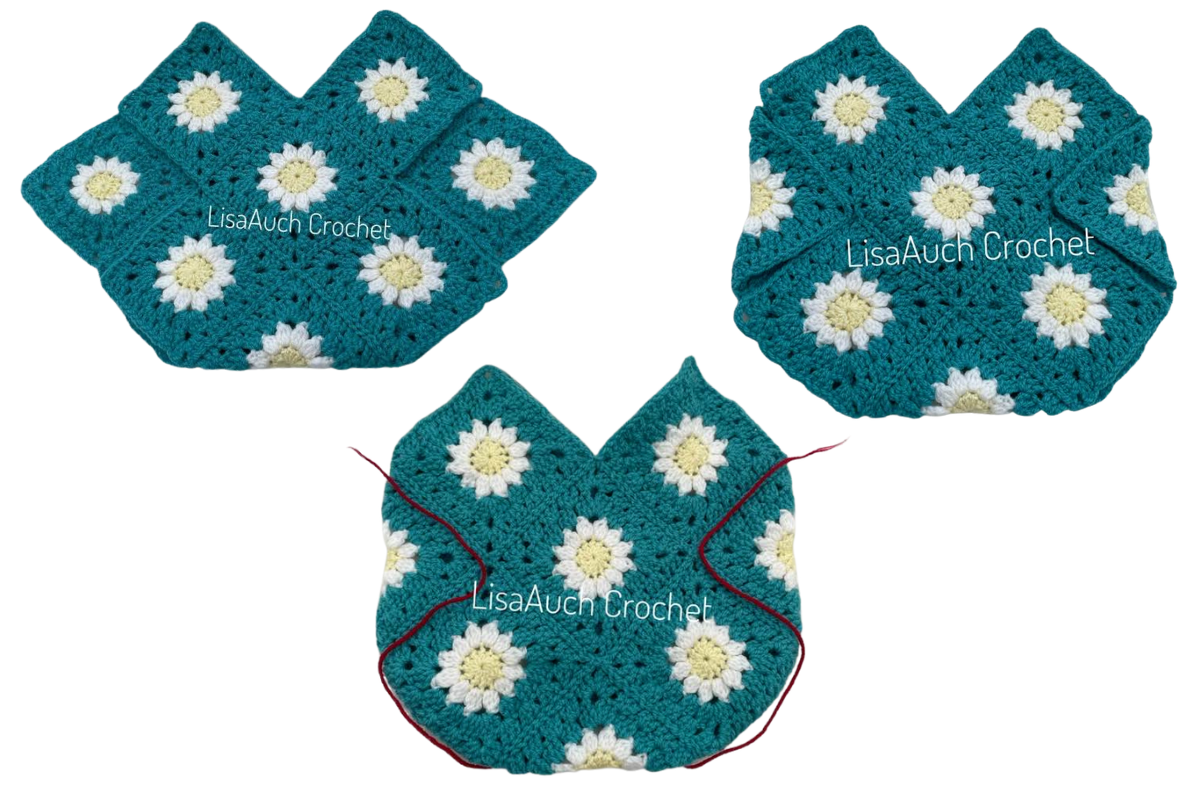
This Daisy Granny Square Bag is made from just 13 granny squares, carefully arranged to create the front, back, sides, and bottom of the bag.
Before you begin joining anything together, take a moment to look at the layout diagram below. Understanding how the squares fit together will make the assembly process much easier.
Once joined, these 13 squares fold naturally into the finished bag, creating a roomy everyday tote with very little shaping required.
Step 3: How to Arrange Your Daisy Granny Squares for the Bag Layout
Now that you’ve crocheted all 13 Daisy Granny Squares, it’s time to arrange them into the bag layout.
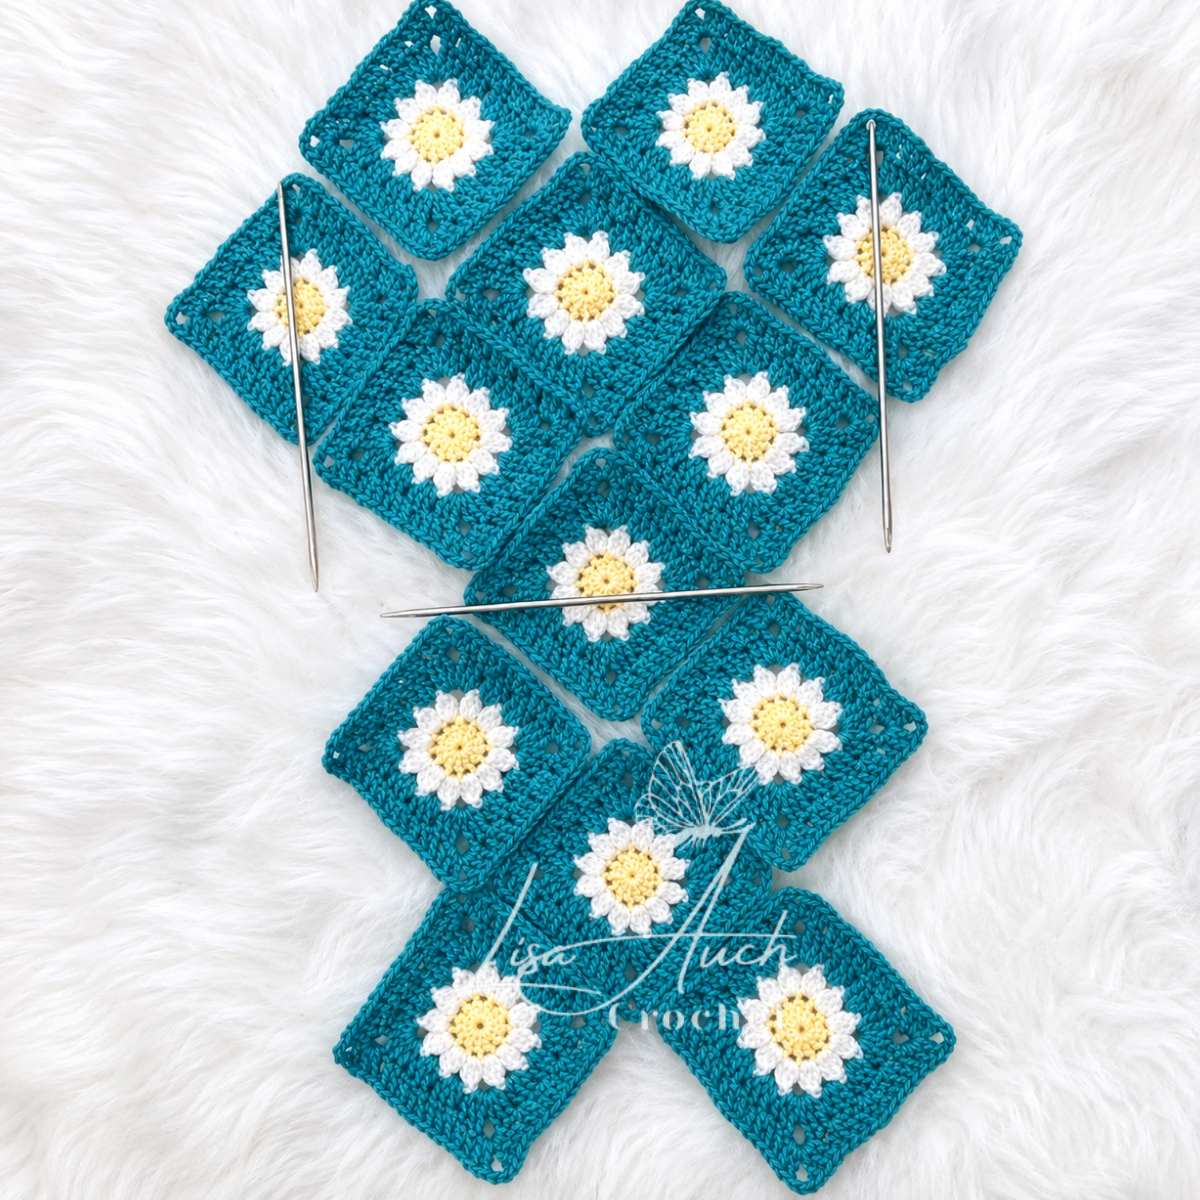
- Before joining anything together, lay all of your squares on a flat surface exactly as shown in the layout diagram below.
- Taking a few minutes to position every square first makes the assembly much easier and helps avoid mistakes later.
- If you’ve used different colours or several shades, this is also a great opportunity to move the squares around until you’re happy with the overall design.
How to Join Granny Squares with Mattress Stitch (Invisible Seam Method)
The mattress stitch is my favourite way to join granny squares because it creates a flat, invisible seam on the right side of your work. It’s perfect for bags, blankets, cardigans, and any project where you want the join to disappear.
🔗 What You’ll Need
- Your finished granny squares
- Matching yarn
- Blunt tapestry needle
- Scissors
** Before You Start
Lay your squares side‑by‑side, right sides facing up. Make sure the stitches and corners line up neatly this keeps the join perfectly straight.
What is the best joining method for the Daisy Granny Square Bag?
The mattress stitch gives the cleanest, flattest, most invisible seam. It keeps your daisies perfectly aligned and creates a strong join without adding bulk ideal for structured crochet bags.
Or you can see more of my most favourite ways to join Granny Squares HERE
Mattress Stitch Joining Technique for Crochet – Step‑by‑Step
1. Identify the “bars”
Along each square’s edge, look for the horizontal bar just inside the outer V of the stitch. These bars are what you’ll sew through.
2. Anchor your yarn
Attach your yarn at the bottom corner of the first square. Thread your needle.
3. Begin stitching
- Insert your needle under the bar on Square A
- Then under the matching bar on Square B
- Pull the yarn through gently This creates the first “ladder rung”.
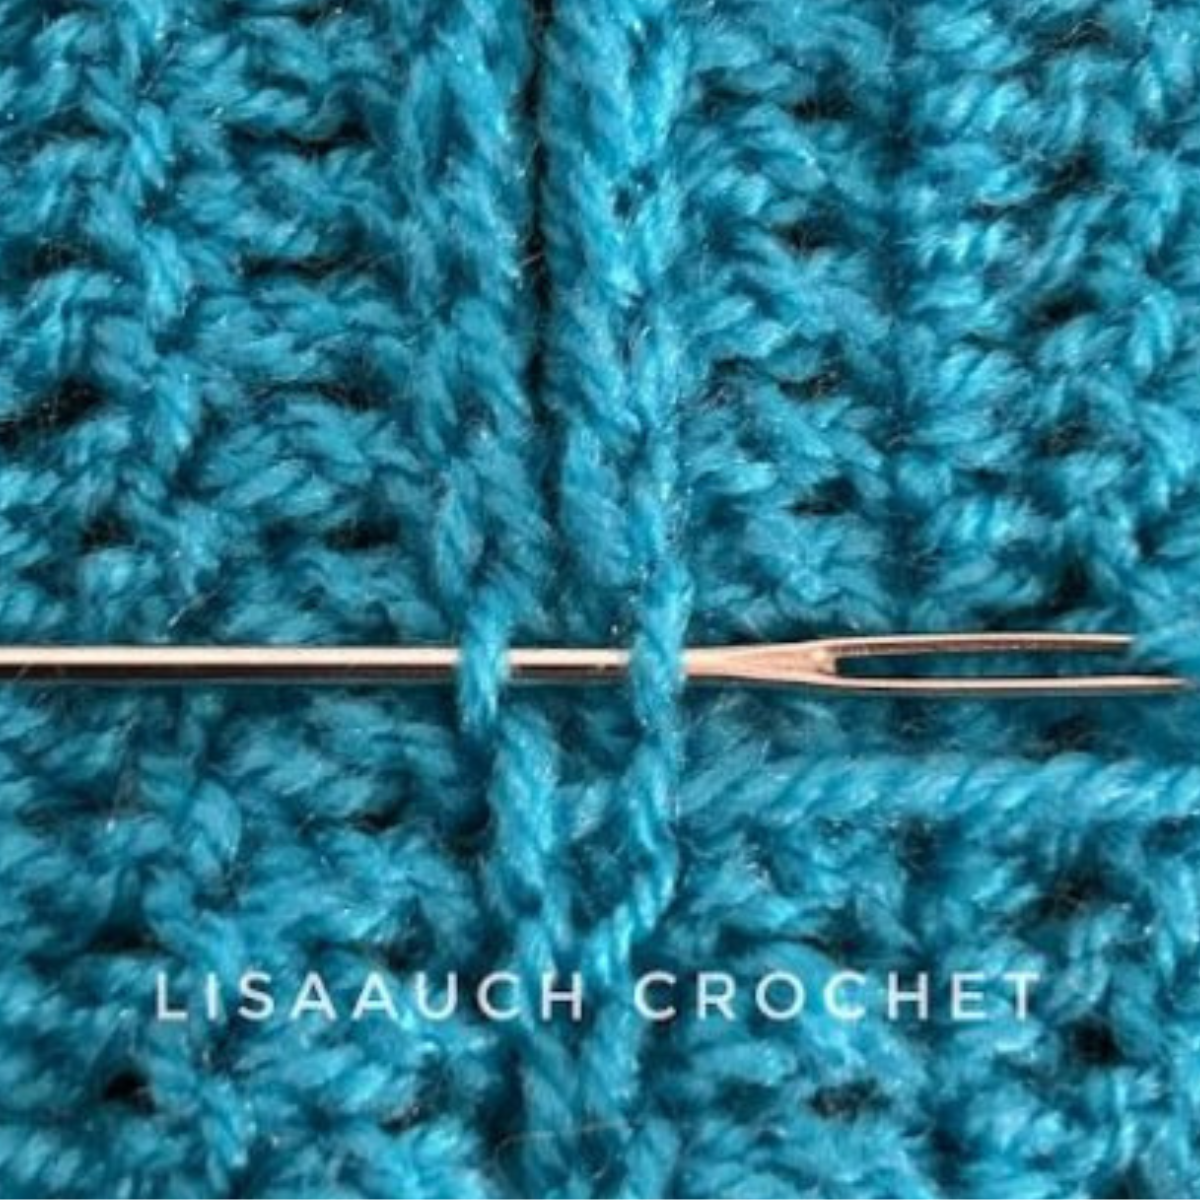
4. Continue up the seam
Repeat the rhythm: Square A bar → Square B bar → pull Work your way up the entire edge.
5. Zip the seam closed
Every few stitches, gently tighten the yarn. You’ll see the seam zip together invisibly on the right side.
Tips for a Perfect Join
- Keep tension light until the end — then tighten smoothly
- Use the same yarn as your squares for a seamless look
- Join squares in strips first for large projects
- Mattress stitch works beautifully even on textured or petal edges
6. Finish
Secure the yarn at the top corner and weave in the ends.
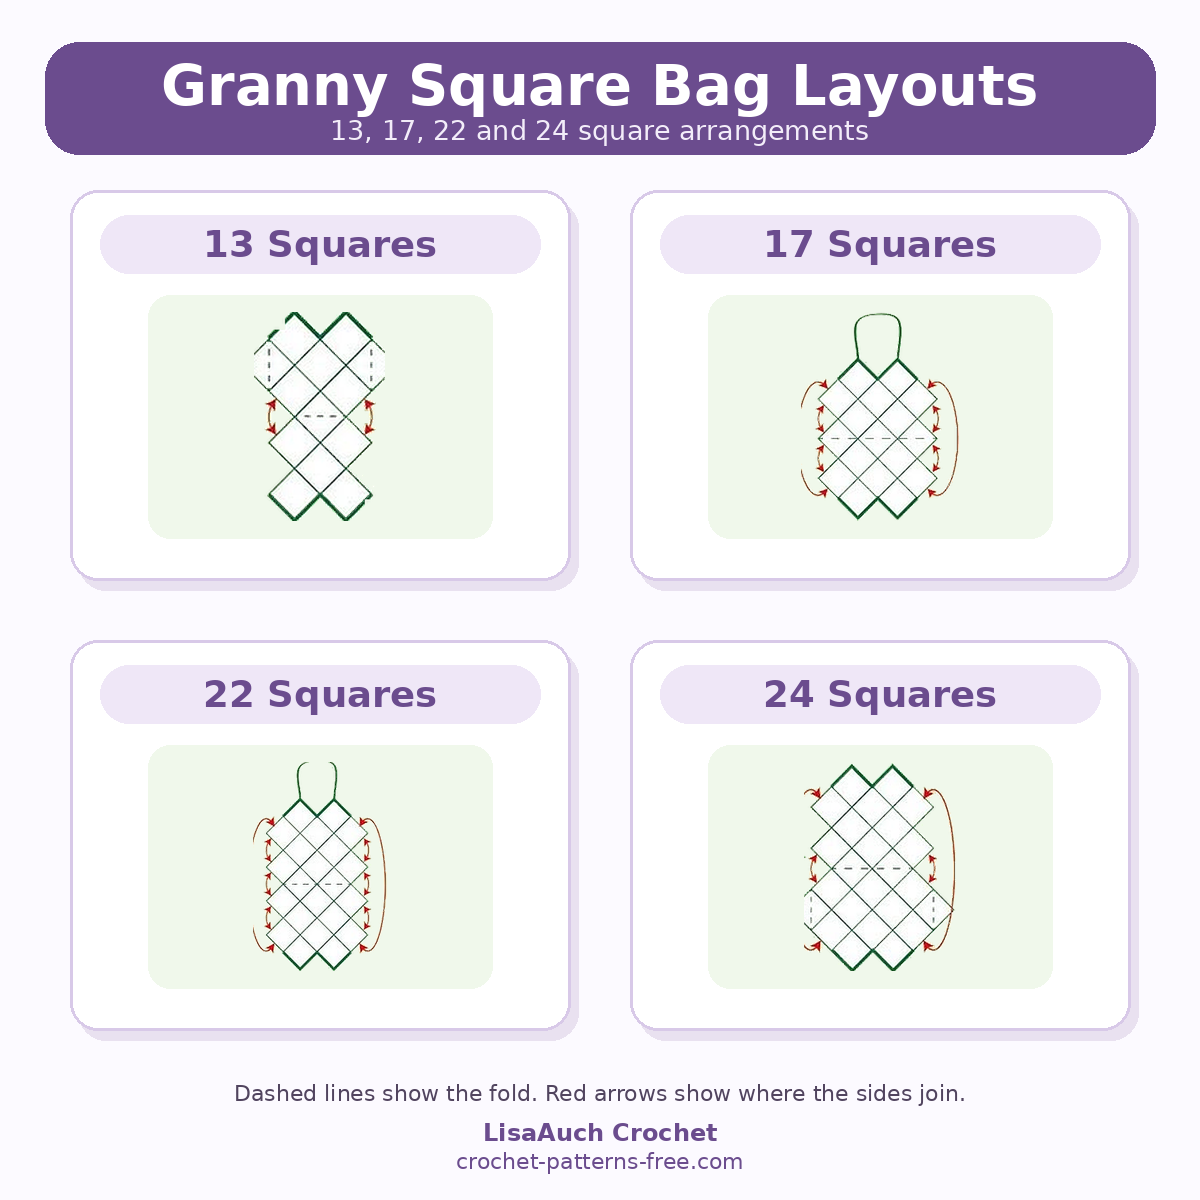
If you Love the look of this bag but its just a bit small you can make a wider crochet bag.
Then you can make 17, 22 and 24 Daisy Granny Squares, and using the bag layouts below to construct the bag.
How to Crochet the Bag Handles
Lay the bag completely flat with the front of the bag facing you.
Join your yarn with a slip stitch to Top Point of the BAG
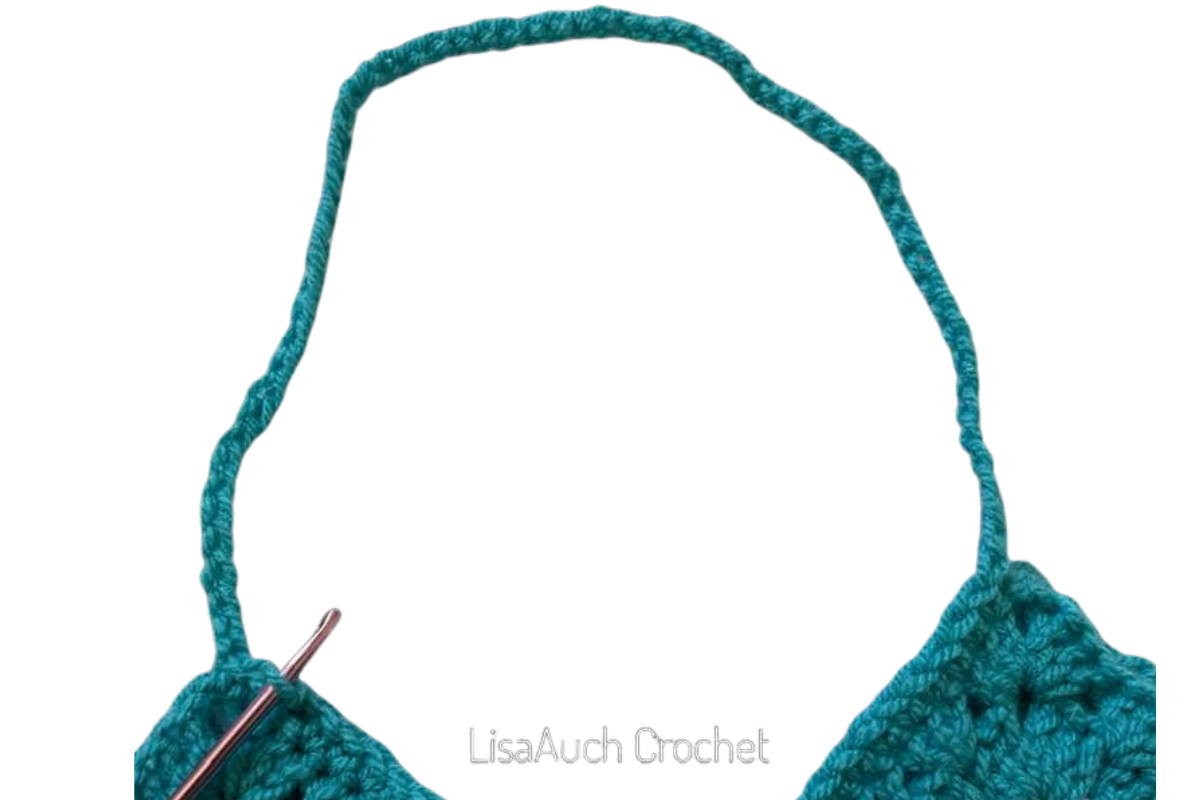
Round 1:
- Ch 1 (does not count as a stitch).
- Work 1 single crochet (sc) in each stitch across until you reach the first inside V corner (the Valley).
- Skip the next 3 stitches across the Valley.
- Continue working 1 sc in each stitch up the opposite side until you reach the top corner (Peak) of the bag.
- Ch 60, or your preferred handle length.
- Make sure the chain is not twisted, then attach it to the opposite Peak with 1 sc in the corner stitch.
- Continue working 1 sc in each stitch around the bag until you reach your starting stitch.
- Join with a slip stitch to the first sc.
Tip: If you’d like a longer or shorter handle, simply adjust the number of chain stitches.
Round 2
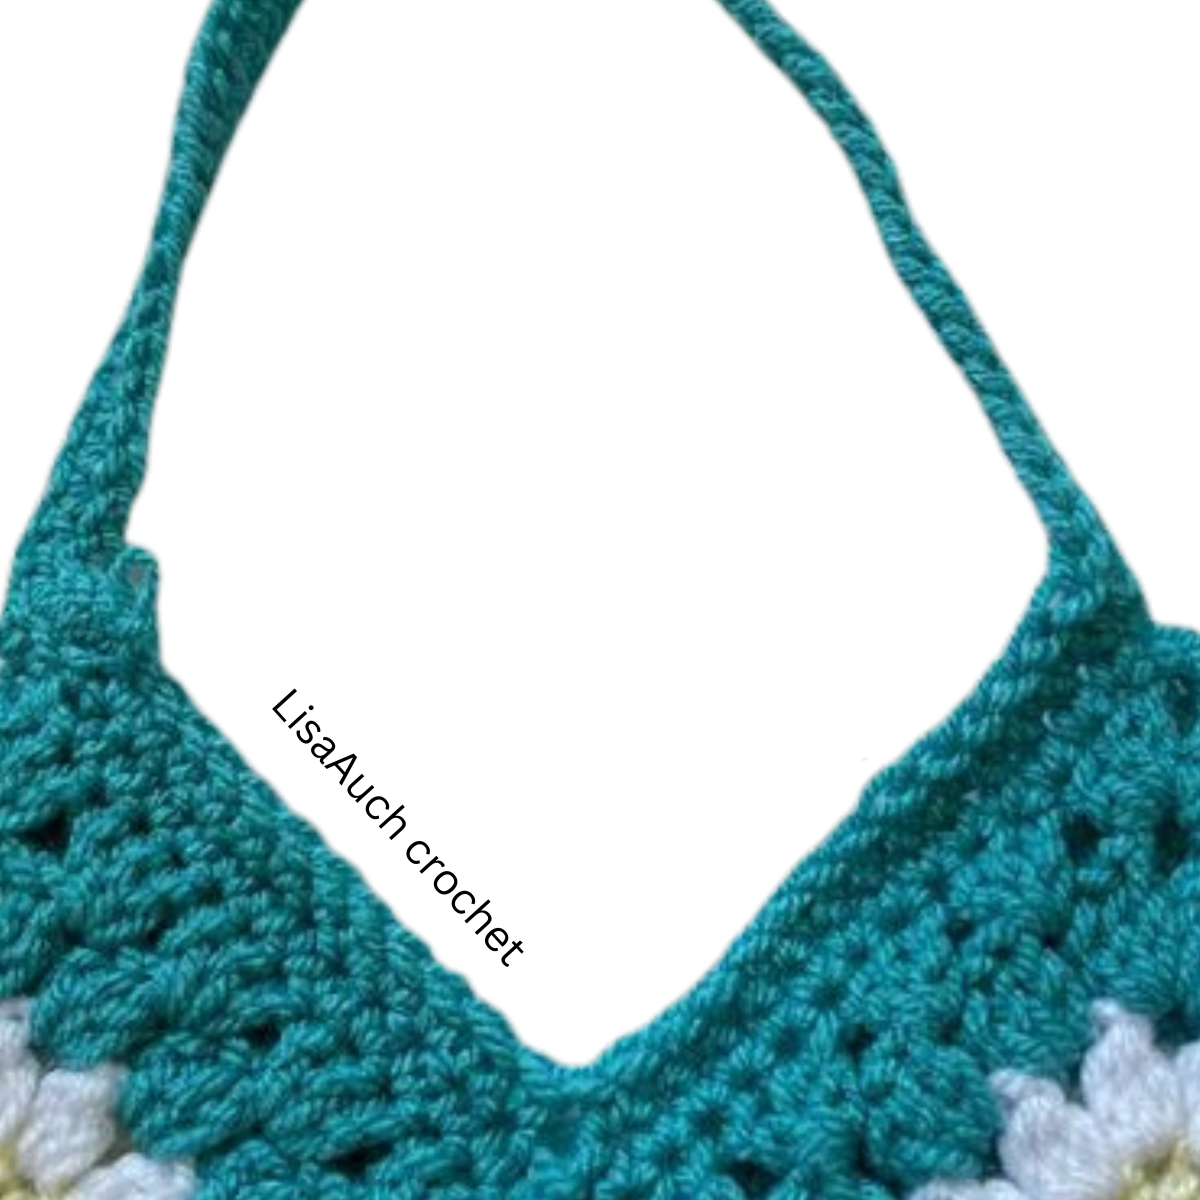
- Ch 1.
- Work 1 sc in each stitch until you reach the Valley.
- Skip 2 stitches across the Valley.
- Continue working 1 sc in each stitch up the opposite side.
- Work 1 sc into every chain across the handle.
- Continue working 1 sc in each stitch around the bag.
- Join with a slip stitch.
Rounds 3 and Beyond (Optional)
- Repeat Round 2 until the handles reach your desired thickness.
- I recommend 3 rounds in total, as the handle becomes thicker once the second side of the bag is crocheted.
Crochet the Second Handle
Work the second handle in exactly the same way on the opposite side of the bag.
Finish the Inside of the Handles
Once both handles have been completed, join your yarn to the inside Valley of the bag.
- Ch 1.
- Work 1 sc in every stitch around the inside opening of the bag.
- Continue by working 1 sc into the back bumps of the handle chains from the front side. This creates a neat, sturdy finish.
- When you reach each Valley, skip 2 stitches.
- If necessary, you can also skip 1 stitch at the top Peak to keep the edge lying flat.
Join with a slip stitch, fasten off, and weave in all yarn ends neatly.
Designer Tip
For extra strength, use a smaller hook for the final handle round, or work an additional round of single crochet if you plan to carry heavier items.
This helps the handles keep their shape and reduces stretching over time.
Love this classic daisy granny square? Now that you’ve mastered the Daisy FLower motif, why not try one of my other free crochet patterns using the same Daisy Flower Granny Square design?
Wearable accessories and more granny square bags- there are plenty of ways to use this versatile floral crochet daisy square.

See more of My Crochet Bag Patterns Made with Granny Squares HERE


You may make and sell finished items made from this pattern. Please credit LisaAuchCrochet as the original designer.
You may not copy, rewrite, reproduce, redistribute, republish, or upload this pattern, in whole or in part, in any format, including as text, PDF, AI-generated or AI-rewritten content, within an app, or as a video tutorial.
You may not use Reader Mode, Print View, Save as PDF, screenshots, content-extraction tools, or any other method to bypass or remove advertising from this website and then upload, import, reproduce, or make the pattern available through another app, website, platform, or service.
All LisaAuch Crochet photographs and images are copyrighted. You may not copy, download, crop, edit, alter, republish, or use these images except as expressly permitted by the LisaAuch Crochet Pattern Use & Copyright Policy.
Factory production and mass manufacturing of items made from this pattern are not permitted.
For full details, please see:
Happy Crocheting! © All Rights Reserved LisaAuchCrochet