
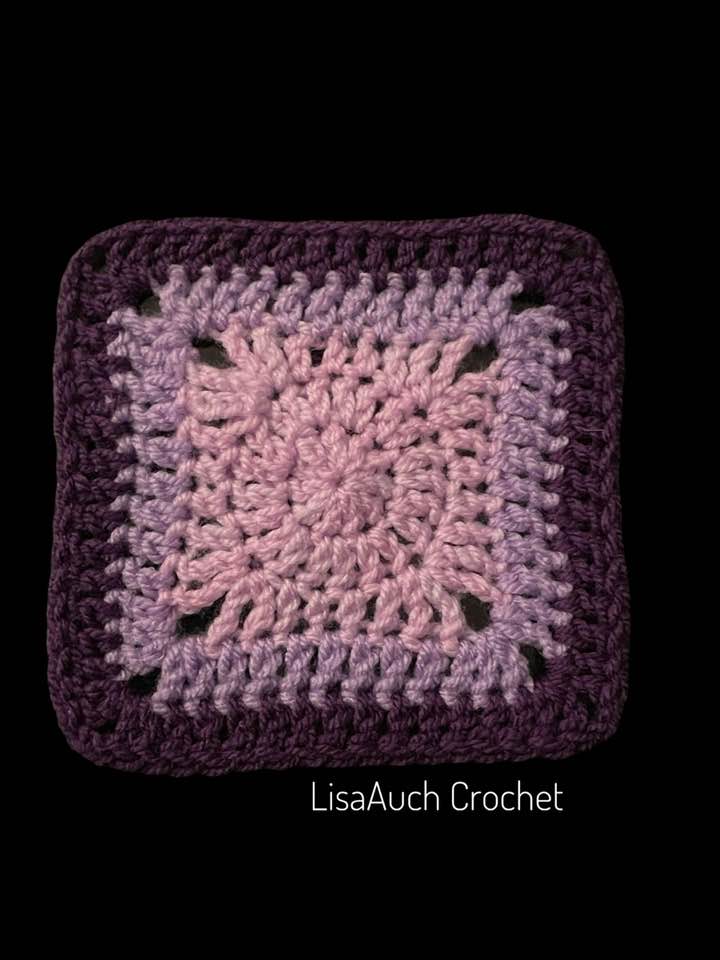
How to Crochet Granny Square with Circle Beginning (FREE PATTERN)
How to crochet a SOLID Granny Square with a Circle at the Center. This is a bit of a twist on The Basic Solid Granny Square Pattern and it is extremely easy.
 pattern")
It can be used for so many projects. but the best project is my quest to stash bust my stash. As Recently I moved house so I got a huge fright at the amount of yarn I had.
The tail end of this year has been about making up patterns using up as much of this yarn as I can!
Disclosure: This post may contain affiliate links. I may earn a small commission at no extra cost to you. All opinions are my own.
I’m amazed at how the smallest pieces of oddballs of yarn can make the most wondrous things.
NOw It’s the turn of learning how to crochet a solid Granny Square with a circle center.
It is perfect for making granny square bags, baby blankets, or even cardigans and sweaters. Or how about a Granny Square Bucket Hat

If you are new to crocheting don’t worry I have added some photos further down the page to help you crochet your first solid granny square
Materials
Any type of yarn (for this square I used Double Knit Yarn)
G/4.5mm Crochet Hook or any hook that suits your yarn
Tapestry Needle
Scissors
Terms Used US
ST(s) – Stitch(es)
CH(s) – Chain(s)
SL ST – Slip Stitch
DC – Double Crochet
Chain stitch does not count as a stitch in the beginning until stated.
HOW to crochet a Solid Granny Square PAttern FREE
Rnd 1: Ch4 work 12 dc into the first ch on the hook, slip to the top of ch4 to join. (10)
Rnd 2: ch3, work 2dc in each st around. Slip to top of ch3 join (20)
Rnd 3: Ch4 (counts as first Treble crochet stitch), Trc in Same space. Ch2, 2 Trc in same space, (corner made)
*Dc in nxt 2 st, hdc in nxt 2 sts, dc in nxt 2 sts, [2Trc, ch 2, 2 Trc in nxt] * Repeat around, Slip ialong nto the FIRST ch2 Space. to join
Rnd 4: Ch4 (counts as Trc), Trc, ch2, 2Trc in Ch2 space. Dc in each stitch across.
*(2Trc,ch2, 2Trc in Ch2 space) Dc in each stitch,* Repeat around.
(4 x 12 dc sts on each side, 4 ch2 space)
Rnd 5: . Ch4 (counts as Trc), Trc, ch2, 2Trc in Ch2 space. Dc in each stitch across.
*(2Trc,ch2, 2Trc in the Ch2 space) Dc in each stitch,* Repeat around.
(4 x 12 dc sts on each side, 4 ch2 space)
If You wish your Solid Granny Square to be bigger then just continue in the established pattern
 pattern")
How to Crochet a SOLID Granny Square Pattern with photos
TO start you will need a small amount of Yarn. For this example I have used small amounts of 3 colours, all Double Knit Yarn and a 4.500 mm hook
 pattern")
Rnd 2: ch3, work 2dc in each st around. Slip to top of ch3 join (20)
 pattern")
Rnd 3: Ch4 (counts as first Treble crochet stitch), Trc in Same space. Ch2, 2 Trc in same space, (corner made)
*Dc in nxt 2 st, hdc in nxt 2 sts, dc in nxt 2 sts, [2Trc, ch 2, 2 Trc in nxt] * Repeat around, Slip ialong nto the FIRST ch2 Space. to join
 pattern")
Rnd 4: Ch4 (counts as Trc), Trc, ch2, 2Trc in Ch2 space. Dc in each stitch across.
*(2Trc,ch2, 2Trc in Ch2 space) Dc in each stitch,* Repeat around.
(4 x 12 dc sts on each side, 4 ch2 space)
Attatch new colour HERE
Rnd 5: Ch4 (counts as Trc), Trc, ch2, 2Trc in Ch2 space. Dc in each stitch across.
*(2Trc,ch2, 2Trc in the Ch2 space) Dc in each stitch,* Repeat around.
(4 x 12 dc sts on each side, 4 ch2 space)
Rnd 5: Ch4 (counts as Trc), Trc, ch2, 2Trc in Ch2 space. Dc in each stitch across.
*(2Trc,ch2, 2Trc in the Ch2 space) Dc in each stitch,* Repeat around.
(4 x 12 dc sts on each side, 4 ch2 space)
If you wish to make the squares bigger just follow the established pattern and increase in every round.

SEE how To join your Granny Squares together to Make a Bag HERE
You can visit my other pages on How to crochet a Granny Square, with a daisy flower center. or a sunflower center
How to Crochet a Granny Square Flower

How to Crochet a Sunflower Granny Square
Thank you for visiting my website or purchasing a pattern.
It helps me to maintain the website and buy new materials to make even more FREE PATTERNS.
As always you are free to make and sell items you have made from the pattern. But you must acknowledge LisaAuch.com as the original designer.
YOU will NOT copy or distribute the pattern online TEXT OR PDF, in part or whole anywhere else,
or by creating an online video of my pattern.
Without my express written permission.
You can share a picture of the finished item. With a link BACK to a Page with my website on it
You must NOT use my pictures in any way to sell a finished product. You must use your own.
You will NOT copy or duplicate this PATTERN (whole or in part) on to ANY other SITE online. Without my express written permission.
This pattern may contain affiliate links.
Where I may make a small commission from your purchase at no extra cost to you
Happy Hooking (c) All Rights Reserved LisaAuch.com


