FREE Crochet Hot Air Balloon Pattern
This free crochet hot air balloon pattern shows you how to make a large 3D hanging hot air balloon using a simple granny stitch design.
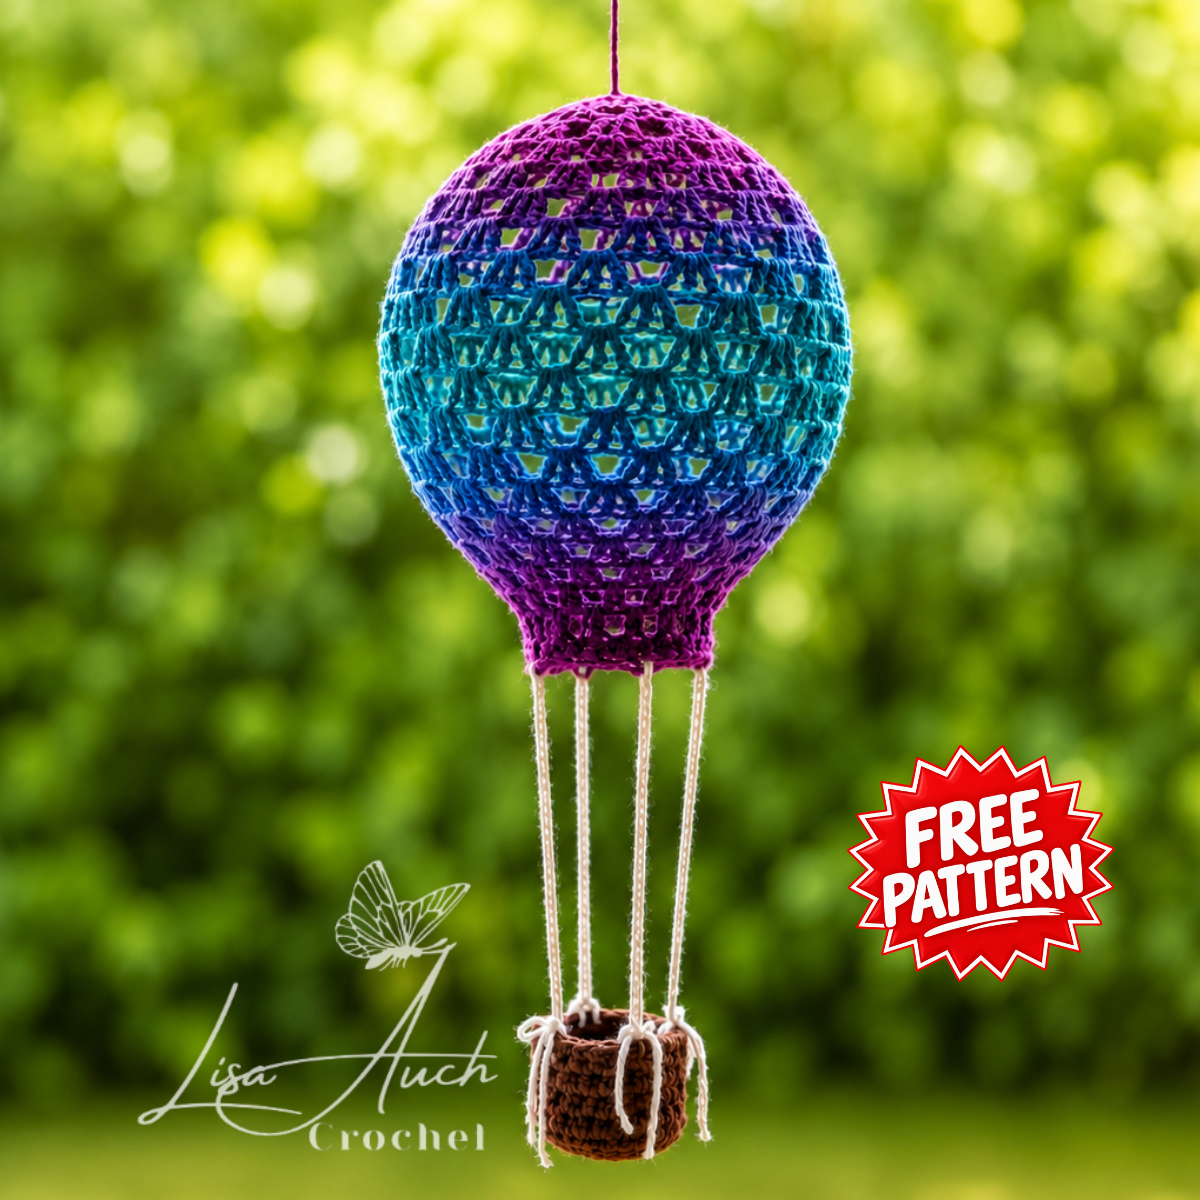
The hanging balloon is worked as a hollow crochet shell, then shaped and stiffened so it holds its form without stuffing, with a separate crochet basket added underneath.
The finished hot air balloon makes beautiful lightweight hanging décor for a nursery, baby shower or boho-style room, and can also be displayed with battery-operated fairy lights.
Disclosure: This post may contain affiliate links. I may earn a small commission at no extra cost to you. All opinions are my own.
What Type of Crochet Hot Air Balloon Is This?
This is a three-dimensional hollow crochet hot air balloon rather than a flat appliqué or stuffed amigurumi.
The crochet granny stitch shell is stiffened over an inflated balloon and paired with a separate crochet basket to create hanging nursery or home décor.
Why You’ll Love This Crochet Hot Air Balloon Pattern
- Lightweight hollow design that holds its shape.
- No stuffing required.
- Perfect for nursery décor, baby showers, and home displays.
- Easy granny stitch construction suitable for confident beginners.
- step by step instructional guide (images, video tutorial and written instructions)
You can now BUY and AD FREE Pdf for the Hot Air Balloon Crochet Pattern on RAVELRY (Cheapest £4 – HERE) or ETSY HERE (£5 due to etsy FEES)
Before You Begin
The balloon is crocheted as an openwork shell using simple granny stitch clusters.
You’ll shape the crochet balloon, then inflate a latex balloon inside the balloon, before stiffening it with a 50:50 PVA craft glue and water solution.
I actually used LESS PVA glue, probably more like 1 PVA to 2 water, and found it held well
Once completely dry, remove the temporary balloon, leaving a sturdy, hollow crochet hot air balloon that holds its shape without stuffing.
This pattern is suitable for confident beginners who are comfortable working in joined rounds, making double crochet stitches, and using slip stitches to join each round.
If you prefer the step by step tutorial on how to crochet the Hot Air Balloon watch the youtube video here
Crochet Hot Air Balloon At a Glance
- Craft: Crochet Home decor
- Project: Crochet Hot Air Balloon
- Skill Level: Easy
- Construction: Hollow self-supporting shell (no stuffing required)
- Technique: Granny stitch double crochet clusters worked in joined rounds with PVA stiffening
- Terminology: US Crochet Terms
How This Crochet Hot Air Balloon Is Made
This crochet hot air balloon is worked as a lightweight hollow shell using simple granny stitch clusters. Once crocheted, the balloon is shaped over an inflated balloon and stiffened so it holds its form without stuffing.
After it has dried completely, the temporary balloon is removed and a separate crochet basket is attached underneath to complete the hanging hot air balloon.
Materials & Tools Required to make a crochet hot air balloon
To complete both the balloon shell, basket, and stiffening process, you will need the following supplies:
- YARN: approx. 100 g Medium Weight #4 (Aran/Worsted) acrylic yarn in your chosen balloon colors
- Crochet Hook : 5.00 mm (H/8)
- Yarn needle
- Scissors
- 1 Deflated Balloon (used as a temporary form, which will be blown up inside the complete crochet balloon!)
- PVA craft glue mixed with Water
- Small bowl for mixing the stiffening solution
- Clear fishing line (optional for cords to hang basket to balloon)
What other yarn types can you use to crochet the hot air balloon?
If you don’t mind the balloon being slightly smaller, I’d actually consider using a DK yarn with a 4.0–4.5 mm hook,
Acrylic yarns take diluted PVA surprisingly well and dry into a lightweight, rigid outer balloon shell.
Advantages:
- Much lighter when hanging.
- Requires less glue to stiffen than cotton.
- Softer rounded shape.
- Great if making a mobile for a nursery.
I also consider using a DK weight cotton, though this will make the balloon smaller. It does absorb more glue, takes longer to dry, and becomes quite heavy.
If you make your balloon in cotton yarn, I’d love to see it! Tag me on social media using #LisaAuchCrochet.
Abbreviation (US Terms)
- ch -Chain
- dc-Double Crochet
- sc-Single Crochet
- slst- Slip Stitch
- space Space
- st(s) – Stitch(es)
- Rnd -Round
- rep – repeat
Special Stitches
2-dc cluster: work 2 dc into the same ch-1 space. 3-dc cluster: work 3 dc into the same ch-1 space. Increase cluster: work (2 dc, ch 1, 2 dc) into the same ch-1 space.
Pattern Notes
- The groups of double crochets are referred to as clusters for easy counting.
- Join each round with a slip stitch unless otherwise stated.
- Slip stitch across stitches as instructed to reach the next ch-1 space before beginning each round.
- The beginning ch 3 counts as the first dc unless otherwise stated.
Free Crochet Hot Air Balloon Pattern – Step-by-Step Instructions
Step 1: Crochet the Hot Air Balloon
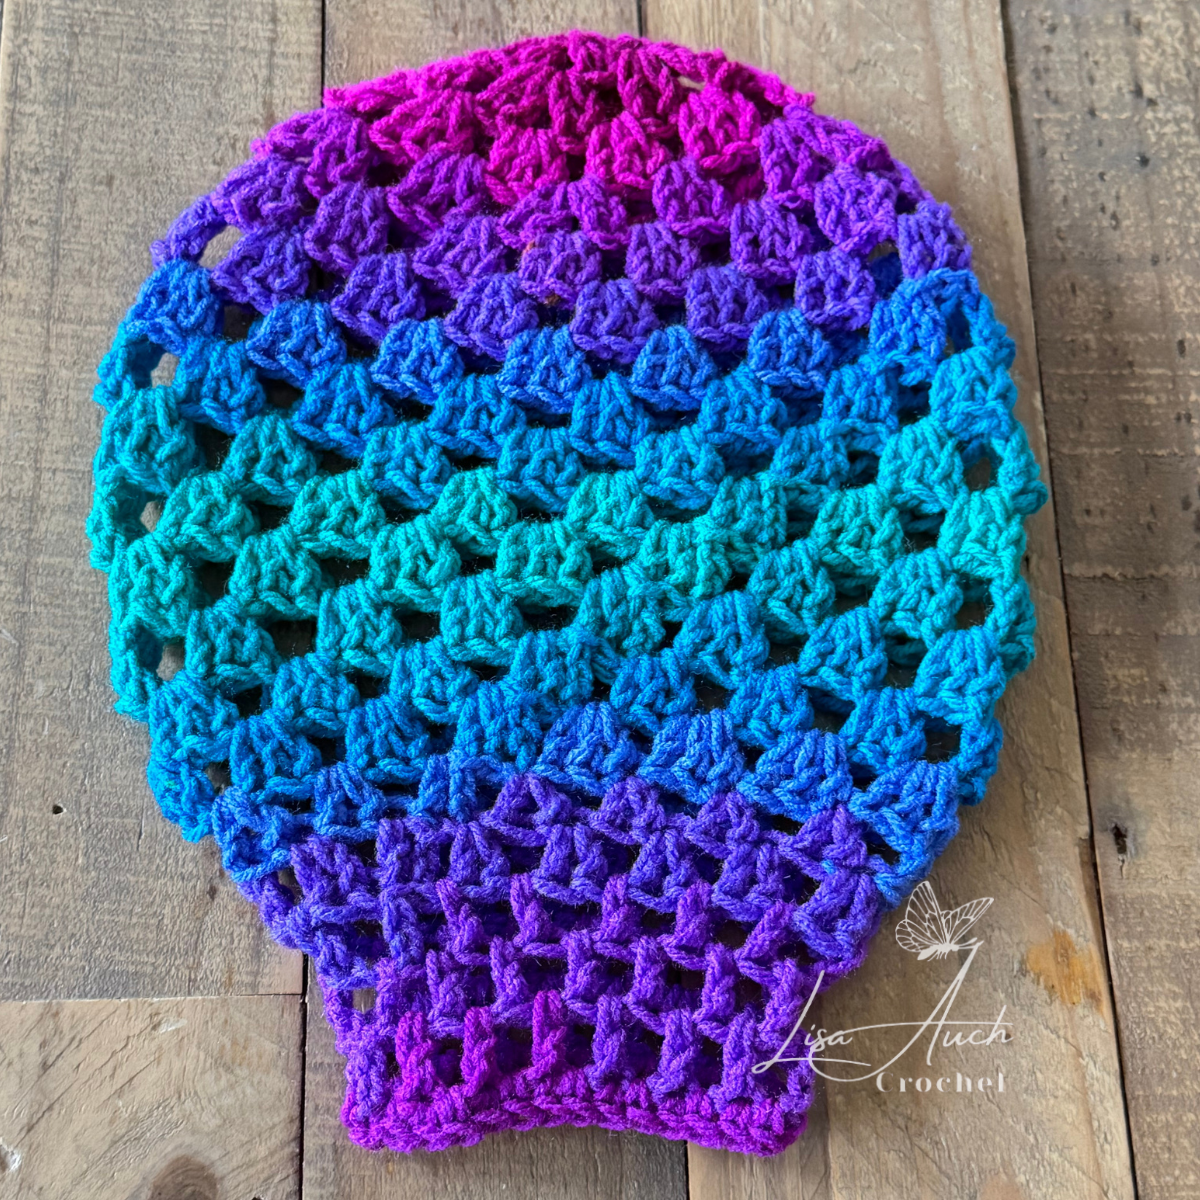
IF you want a crochet hot air balloon lamp shade cover, depending on your Light fitting SIZE the starting circle must be wide enough to slip the light fitting through it. **Chain 10, and slst to join into a ring and work the FIRST round around this RING.
Round 1: Ch 4 (counts as first dc, ch1 and forms the center ring or see above for alternate start ). Working into the first chain: *1 dc, ch 1, * four more times. Join with a sl st to the top of the beginning ch 3. (5 x 1dc clusters )
Round 2: Sl st in next dc and into ch-1 space. (Ch 3, dc, ch 1, 2 dc )in same space. *Ch 1, (2 dc, ch 1, 2 dc) in next ch-1 space.* Repeat around. Join. (10 x 2dc clusters)
Round 3: Sl st into next dc and ch-1 space. Ch 3, 2 dc in same space. *Ch 1, 3 dc in next ch-1 space*. Repeat around. Ch 1, join. (10 x 3-dc clusters)
Round 4: Sl st across next 2 dc and into ch-1 space. Ch 3, 2 dc in same space. *Ch 1, (2 dc, ch 1, 2 dc) in next ch-1 space, ch 1, 3 dc in next ch-1 space*. Repeat around. Join. (5x 2dc, ch1 2dc increase clusters, 5x 3-dc clusters)
Round 5: Sl st across next 2 dc and into ch-1 space. Ch 3, 2 dc in same space. *Ch 1, 3 dc in next ch-1 space.*Repeat around. Join. (15 x 3-dc clusters)
Rounds 6–15:Repeat Round 5.
- You should now have a long hollow cylindrical balloon body before beginning the shaping rounds.(15 x 3dc clusters)
Round 16: Sl st across next 2 dc and into ch-1 space. Ch 3, dc in same space (2-dc cluster made). *Ch 1, 2 dc in next ch-1 space.* Repeat around. Join. (15 x 2-dc clusters)
Round 17: Repeat Round 16. (15 x 2-dc clusters)
Round 18: Sl st into next dc and ch-1 space. *Ch 3.(THIS counts as FIRST Dc) *Ch 1, dc in next ch-1 space. * Repeat around. Join. (15 dc sts with ch-1 spaces)
Round 19- Round 20: Repeat Round 18.
Round 21: Ch 1. *Sc, ch 1 in each ch-1 space*. Repeat around. Join with a sl st. Fasten off and weave in the end. SECURELY and Neatly
Finished Balloon
The balloon shell is now complete and ready to be shaped and stiffened.
Step 2: Shape and Stiffen Your Balloon
- Insert a deflated balloon through the opening in your crocheted balloon shell.
- Once it’s inside, gently inflate the balloon until the crochet is lightly stretched into shape at its widest point.
- You may need to carefully slide and manoeuvre the balloon around so the knot sits neatly at the top opening of the crochet shell. (USE this knot to tie a piece of yarn around so you can hang it upside down to dry
- Don’t overinflate the balloon, as this could stretch the stitches too much or cause the balloon to burst.
- The crochet should hold a smooth, rounded shape at the widest part without being under excessive tension.
- Tie off the balloon, then prepare a 50:50 mixture of PVA craft glue and water in a large container or bowl big enough to fit the balloon in.
- Roll the entire crochet-covered balloon through the mixture until the yarn is evenly saturated.
- Tie a length of scrap yarn securely around the balloon knot.
- This will allow you to hang the balloon while it dries, and hang the balloon upside down in a well-ventilated place to dry completely.
- I usually hang mine on the washing line on a dry, breezy day, and it dries beautifully.
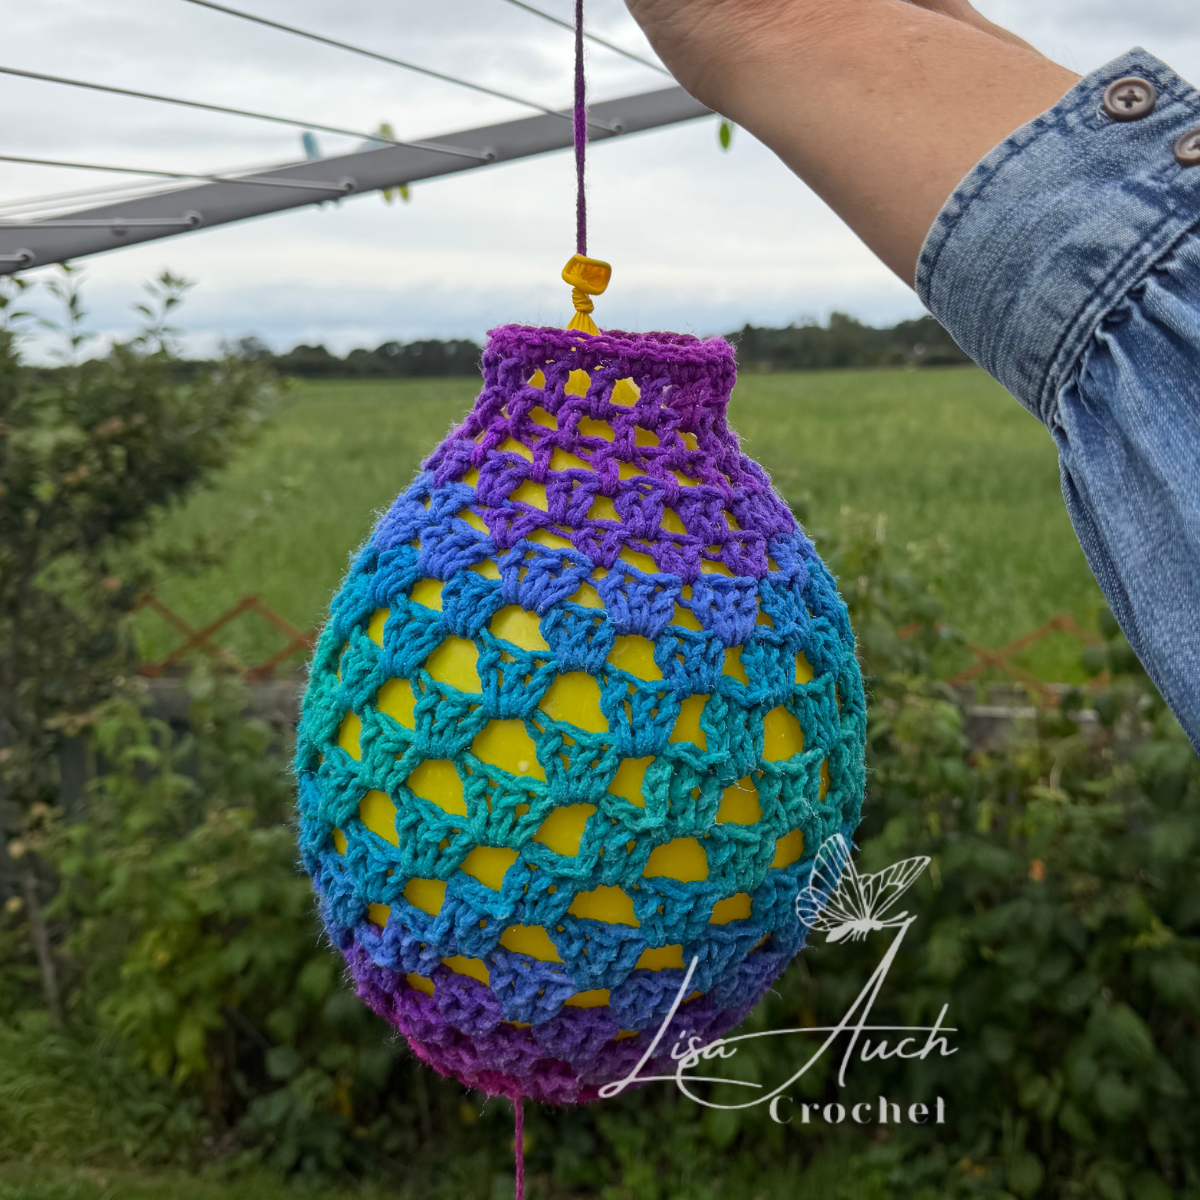
While the balloon is completely drying, Start to crochet the hanging basket so it’s ready to assemble later.
Step 3: Crochet the Hanging Basket Pattern
While your balloon is drying completely, it’s the perfect time to crochet the small hanging basket.
The basket is worked separately and will be attached once the balloon has hardened and completely dried up! DO NOT skip this bit, or it will lose shape!
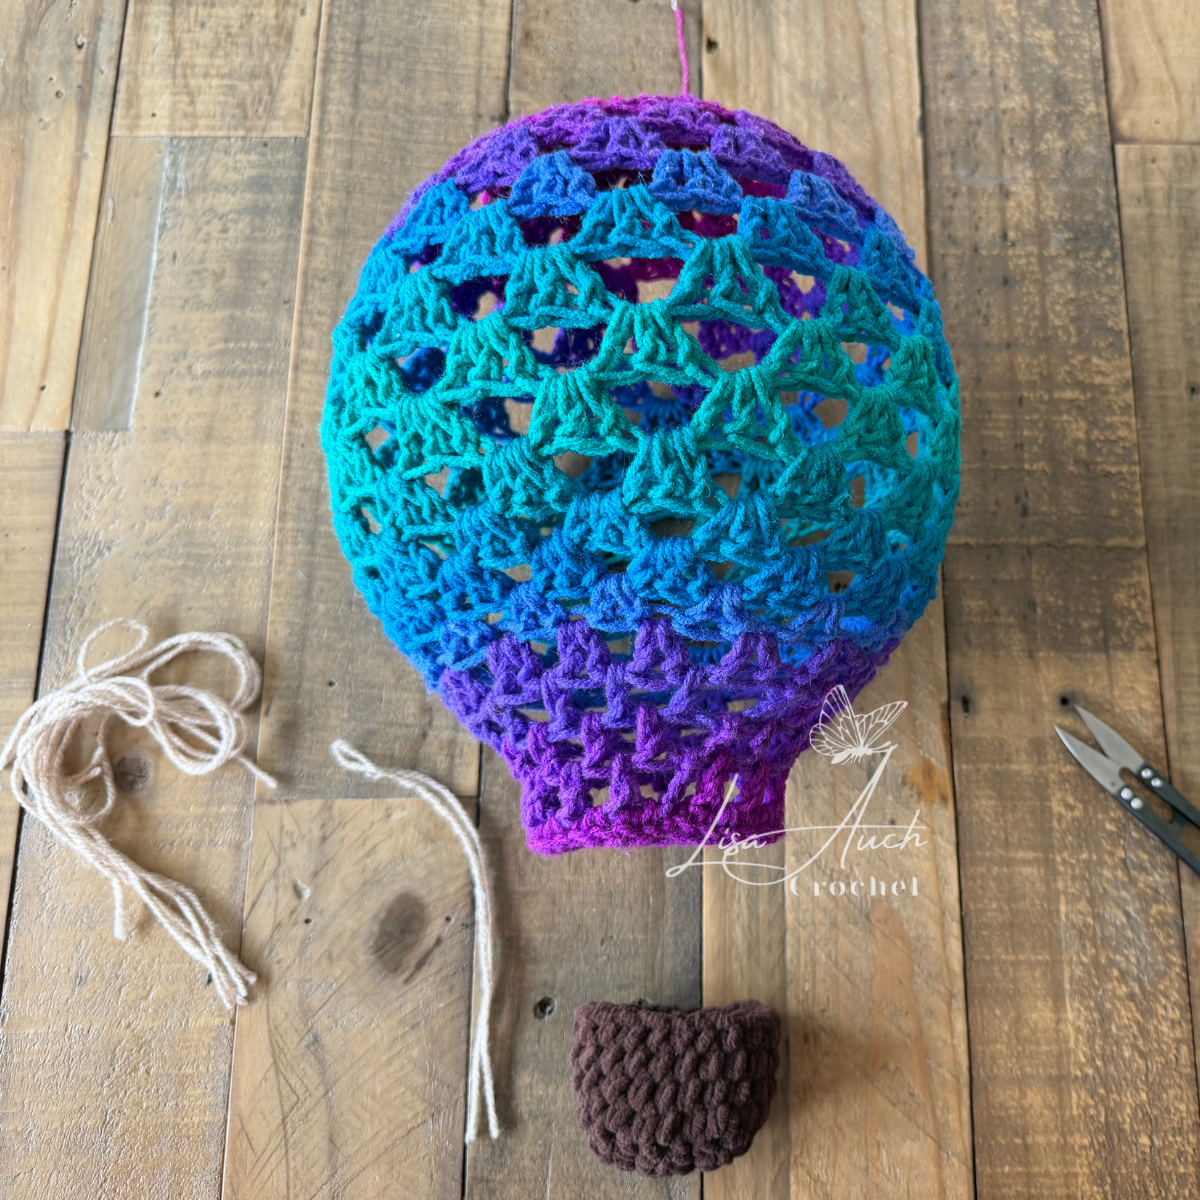
Crochet Hot Air Balloon Basket
Using Brown Yarn (or preferred colour in matching yarn weight and hook to the main balloon)
Basket Base
Ch 6
Row 1: Sc in 2nd ch from hook and in each ch across. Ch 1, turn. (5 sc)
Rows 2-5: Sc in each st across. Ch 1, turn. (5 sc) Do not fasten off.
Basket Sides
Rnd 1: Working evenly around the square, sc along the first side, sc in corner, sc along next side, sc in corner, sc along next side, sc in corner, sc along final side, sc in last corner. Join with a sl st. (20 sc)
Rnd 2: Ch 1, working in BLO, sc in each st around. Join with a sl st. (20 sc)
Rnd 3: Ch 1, sc in each st around. Join with a sl st. (20 sc)
Fasten off and weave in ends.
Step 4: Making the Hanging Cords
Choose one of the following methods to suspend your basket:
Crochet Cords: Using matching yarn, make 4 cords.
Cord 1-4: Ch 25, sl st in the 2nd ch from hook and in each remaining ch. Fasten off, leaving a long tail for sewing.
Attach one cord securely to each corner of the basket. Sew the opposite ends evenly around the bottom edge of the balloon so the basket hangs level.
OR
Fishing Line: For an ultra-lightweight hot air balloon, use 4 equal lengths of clear fishing line instead of crocheted cords.
Tie one length securely to each corner of the basket, then attach the opposite ends evenly around the bottom edge of the balloon, ensuring they are all equal and evenly spaced to hang level.
The transparent line is almost invisible, giving the basket the illusion of floating beneath the balloon.
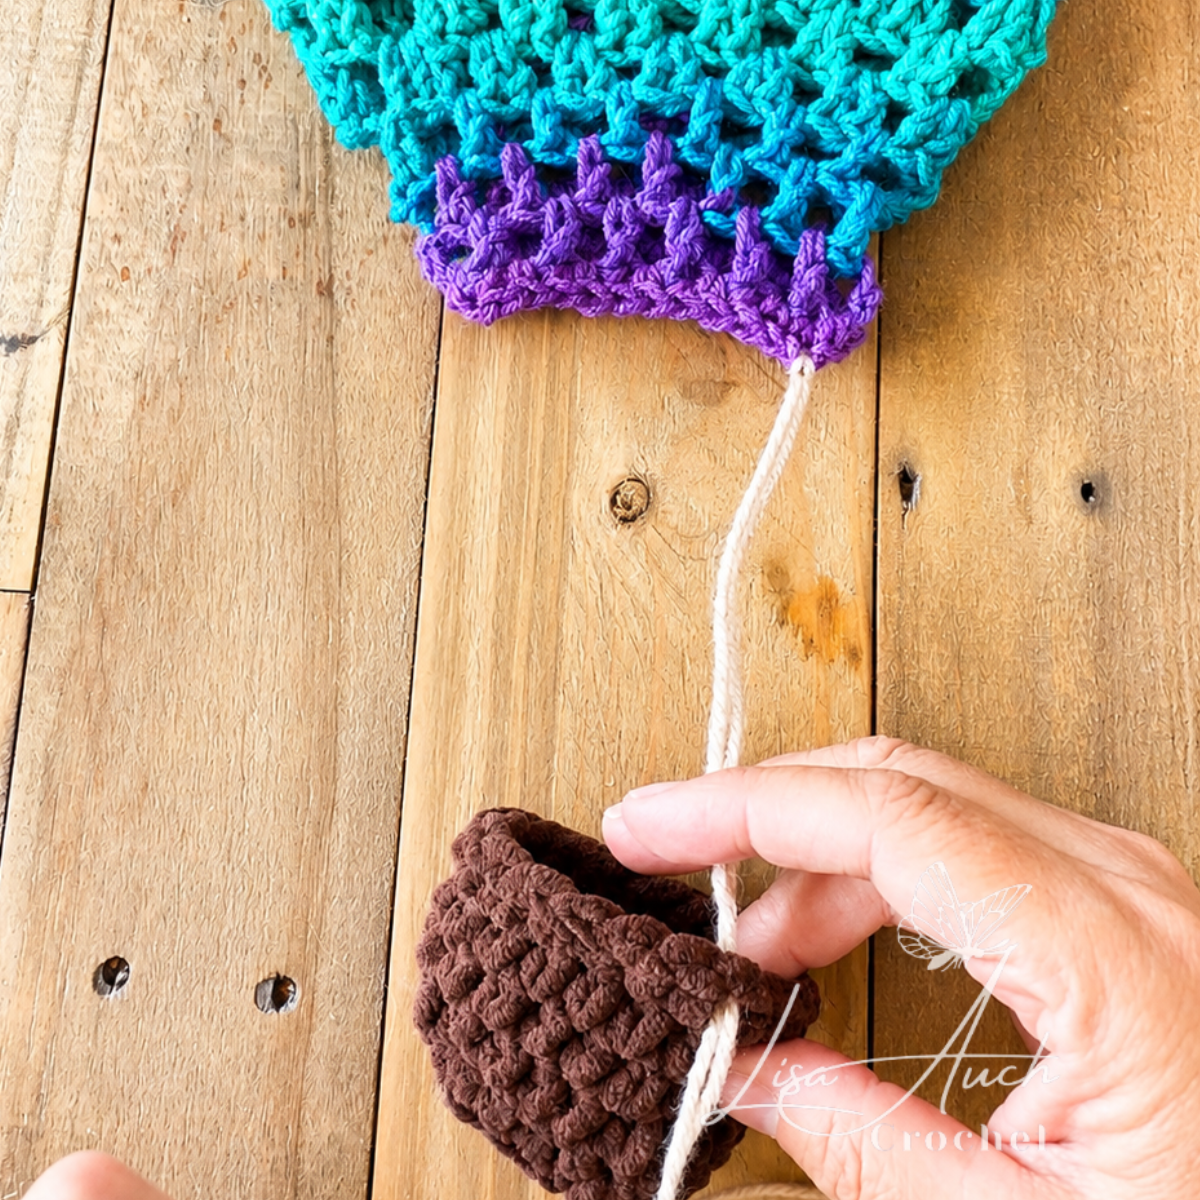
Step 5: Time to Reveal Your Crocheted Hot Air Balloon
Once the crochet shell is completely dry and feels firm to the touch, it’s time for the best part!
- Carefully pop the balloon and gently pull it out through the opening in the bottom of the crochet shell.
It’s such a satisfying moment watching the inside latex balloon disappear while the crocheted balloon keeps its beautiful shape.
I still love this part every single time!
Your hollow crochet hot air balloon is complete and ready to display.
Hang it in a nursery as a hot air balloon nursery mobile , fun party décor, or use it as a lamp, add battery-operated fairy lights – , Like these ones HERE
I hope you’ve enjoyed making this crochet hot air balloon as much as I enjoyed designing it! Whether you hang it in a nursery, decorate a special event, or simply display it in your home, it’s a lightweight project that’s sure to attract compliments.
If you enjoyed this project, you might also love my other beginner-friendly crochet décor and gift patterns.
I’d Love to See Your Completed Balloons!
I absolutely love seeing your finished projects! If you make this crochet hot air balloon pattern, don’t forget to tag me on social media using #LisaAuchCrochet so I can admire and share your beautiful creations.
How do you stiffen a crochet hot air balloon?
The easiest way is to soak the finished crochet balloon in a 50:50 mixture of PVA craft glue and water. Gently squeeze out the excess mixture, shape it over an inflated balloon, then leave it hanging until completely dry before removing the balloon inside.
Can beginners crochet this hot air balloon?
Yes. If you already know how to make chains, double crochet stitches, slip stitches and work in joined rounds, you’ll find this pattern easy to follow. The granny stitch construction is repetitive, making it an enjoyable project for confident beginners.
Can I make a larger crochet hot air balloon?
Yes. Continue increasing as the previous increasing round, before beginning the straight rounds. A larger balloon will need a slightly larger basket and longer hanging cords to keep everything in proportion.
Other Hanging Decoration Free Patterns i have for you to try

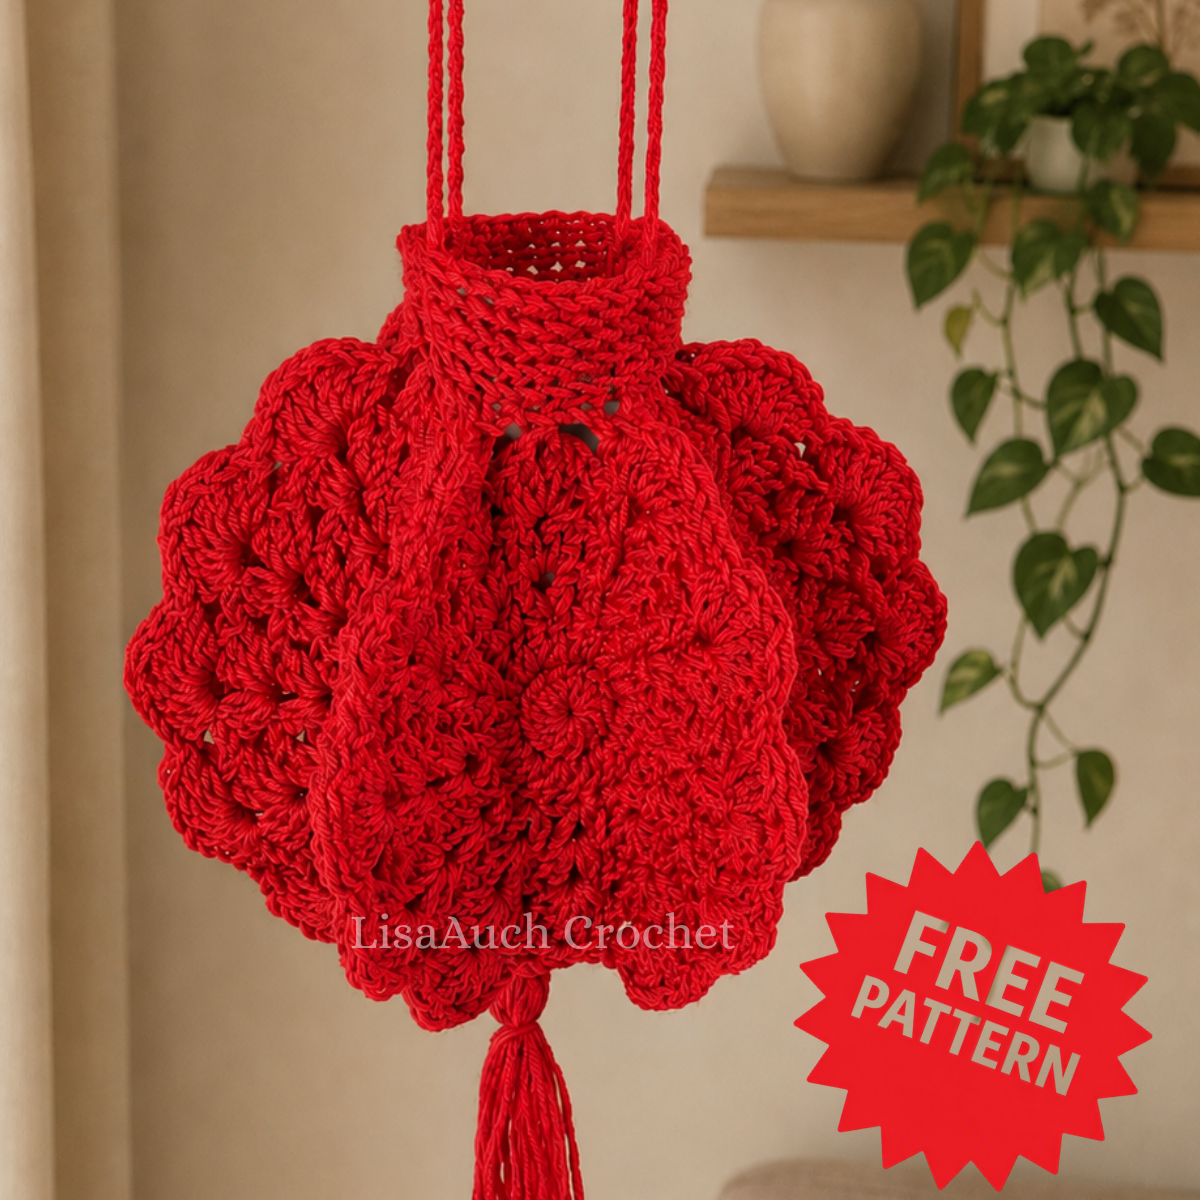


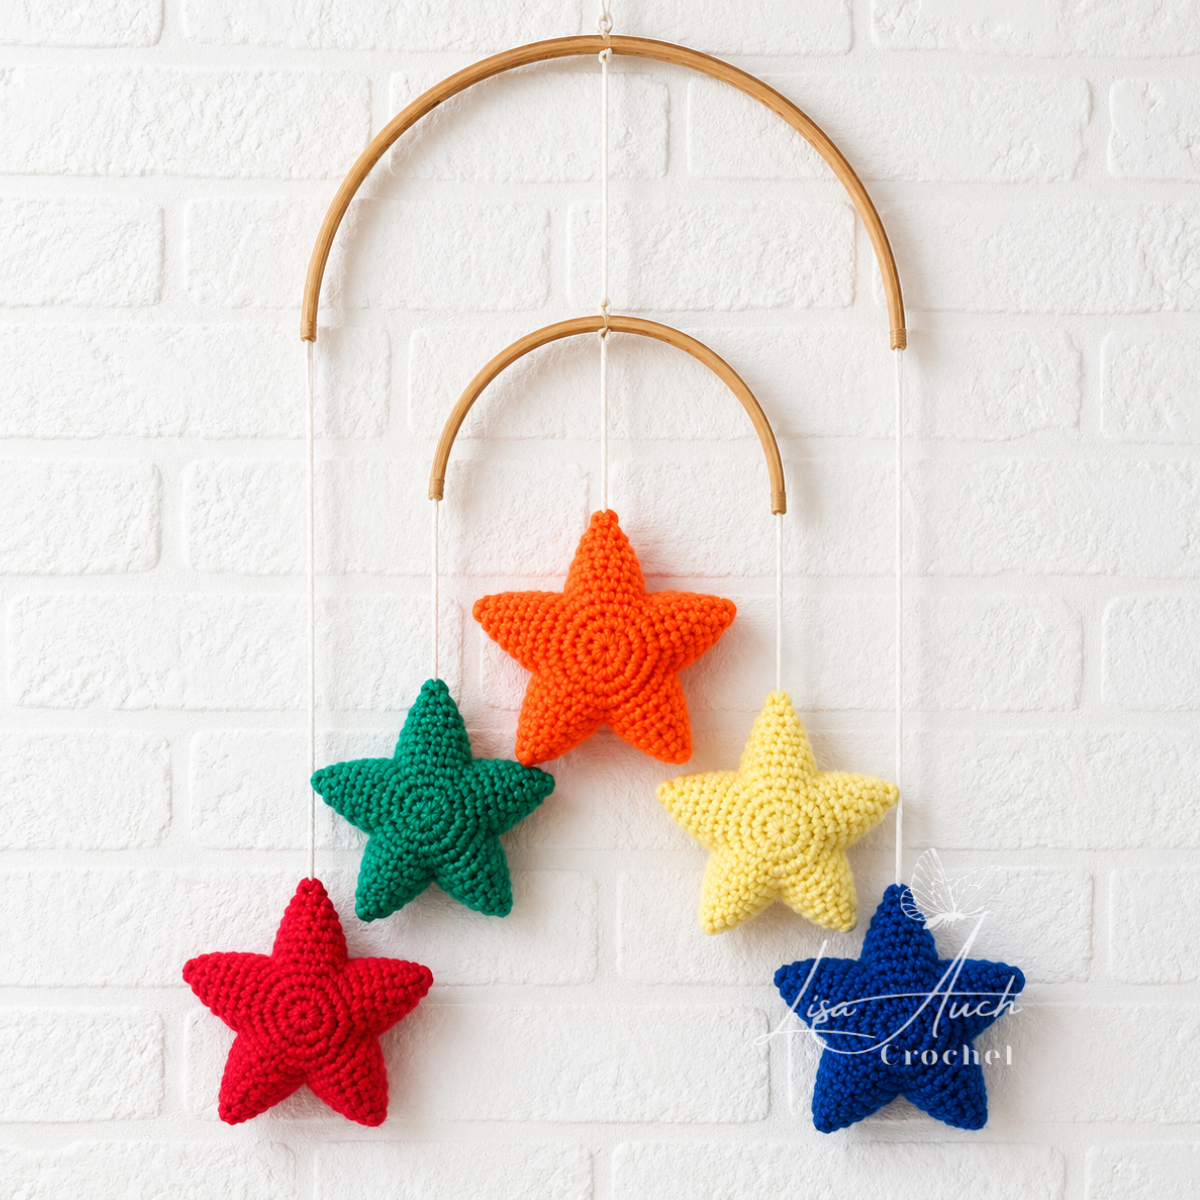
Why not try more of my beginner friendly FREE CROCHET PATTERNS. Pair your crochet hot air balloon with one of my crochet baby blanket patterns And use my Crochet Duck pattern but made in DK yarn to put into the Balloons Basket to crochet a truly unique crochet baby gift
If you enjoy making decorative home decor crochet projects, you’ll also love my Easy Crochet Hanging Lantern Pattern, or the popular windspinners
You may make and sell finished items made from this pattern. Please credit LisaAuchCrochet as the original designer.
You may not copy, rewrite, reproduce, redistribute, republish, or upload this pattern, in whole or in part, in any format, including as text, PDF, AI-generated or AI-rewritten content, within an app, or as a video tutorial.
You may not use Reader Mode, Print View, Save as PDF, screenshots, content-extraction tools, or any other method to bypass or remove advertising from this website and then upload, import, reproduce, or make the pattern available through another app, website, platform, or service.
All LisaAuch Crochet photographs and images are copyrighted. You may not copy, download, crop, edit, alter, republish, or use these images except as expressly permitted by the LisaAuch Crochet Pattern Use & Copyright Policy.
Factory production and mass manufacturing of items made from this pattern are not permitted.
For full details, please see:
Happy Crocheting! © All Rights Reserved LisaAuchCrochet